
Side Dishes
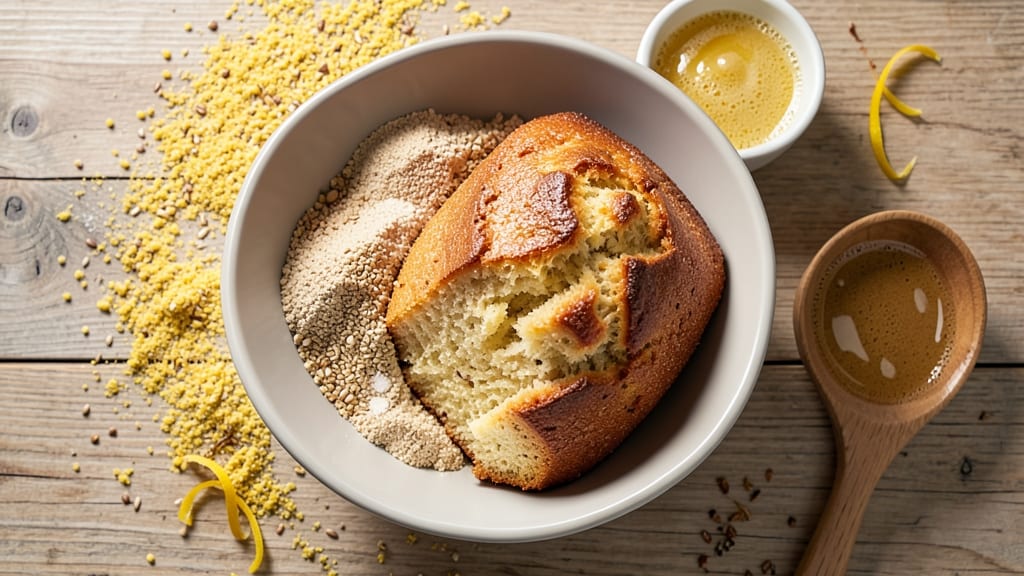
This all-purpose gluten-free flour bread machine recipe proves you don't need gluten for a crusty exterior and light interior—just the right blend and technique. After years of testing gluten-free formulas, I've perfected a ratio that mimics traditional bread while accommodating gluten-free requirements.
The key lies in precise hydration and a specialized flour blend that creates structure without gluten.
Most gluten-free breads sacrifice texture, but this recipe delivers restaurant-quality results straight from your bread machine. The secret is using a 1:1 gluten-free flour blend with added xanthan gum for elasticity, plus a touch of psyllium husk for improved crumb structure.
These ingredients work together to create a loaf that slices beautifully and holds its shape.
What you'll end up with is a golden-brown loaf with a crispy crust and tender crumb—no crumbly texture or dense heaviness here. The aroma alone will fill your kitchen with that familiar bread smell, and each slice will toast perfectly for breakfast or sandwiches.
This recipe transforms gluten-free baking from compromise to confidence.
Perfect for sandwiches, toast, or French toast, this bread machine recipe delivers consistent results every time. The best part? You can customize it with seeds, herbs, or even a touch of sweetness without sacrificing structure. Let's get started on your first perfect gluten-free loaf.
Ingredients for all purpose gluten free flour bread machine
The right gluten-free blend transforms your bread machine into a golden crust, tender crumb maker.
| Ingredient | Amount | Notes |
|---|---|---|
| 1:1 Gluten-Free Flour Blend 🌾 | 3 ½ cups | Contains rice flour, potato starch, tapioca starch |
| Xanthan Gum 🧂 | ½ tsp | Essential for elasticity and structure |
| Psyllium Husk Powder 🌿 | 1 tbsp | For improved crumb and moisture retention |
| Granulated Sugar 🍚 | 2 tbsp | Enhances browning and flavor |
| Active Dry Yeast 🍞 | 1 ½ tsp | Ensure yeast is fresh for best results |
| Warm Water 💧 | 1 ¼ cups | 110°F (43°C) for optimal yeast activation |
| Extra-Virgin Olive Oil 🫒 | 2 tbsp | For moisture and rich flavor |
| Salt 🧂 | 1 ½ tsp | Diamond Crystal preferred for consistency |
| Honey or Maple Syrup 🍯 | 1 tbsp | Optional for added sweetness and browning |
| Sunflower Seeds or Flaxseeds 🌻 | ¼ cup | Optional for texture and nutrition |
| Fresh Rosemary or Thyme 🌿 | 1 tsp | Optional for aromatic enhancement |
The 1:1 gluten-free flour blend is your foundation—look for brands like Bob’s Red Mill or King Arthur that include rice flour and potato starch for that perfect balance. Xanthan gum is non-negotiable here; it mimics gluten’s elasticity, and skipping it means a dense, crumbly loaf. Psyllium husk powder might sound odd, but it’s what gives this bread that professional bakery texture. I always grab mine from the bulk section at Whole Foods—it’s cheaper and fresher than those tiny jars. Pro tip: if your blend doesn’t include xanthan gum, add it yourself; most pre-mixed gluten-free flours need it.
No xanthan gum? Psyllium husk powder at double the amount can help, but the texture won’t be identical. Short on seeds? Chopped walnuts or almonds work beautifully for crunch. Fresh herbs? Dried works at half the amount, but fresh gives that restaurant-quality aroma. The yeast is critical—if it’s older than 3 months, test it first in warm water to see if it foams. And that honey or maple syrup? Agave works too, but honey adds a lovely depth of flavor that’s hard to beat. The olive oil should be extra-virgin—Trader Joe’s has a great affordable option.
Mix everything except yeast and water first, then let the dough knead in your bread machine for 3-5 minutes before adding yeast. The dough will look shaggy at first—don’t panic. Once baked, this loaf stays fresh for 3 days at room temperature, or 1 week in the fridge. For longer storage, slice and freeze portions—toast straight from frozen for crispy results. The crust gets crunchier as it cools, so let it rest for at least 10 minutes before slicing. Trust me, the first slice is worth the wait.
Why You'll Love This Recipe
- Bread Machine Magic: I swear, this recipe makes me feel like a baking pro—just toss everything in the machine, press start, and walk away. The psyllium husk powder does all the heavy lifting for structure, so you don’t have to fuss with extra binders or tricky kneading.
- Buttery Soft Crust: That little pinch of sugar and the xanthan gum work together to give you a tender crumb and a crust that’s just firm enough to hold up to toast or sandwiches. Honestly, it’s the closest I’ve gotten to classic bread texture without gluten—and no one can tell the difference.
- Weeknight Workhorse: I make a loaf every Sunday because it’s perfect for meal prep: sturdy enough for sandwiches, toastable for breakfasts, and even holds up to grilled cheese. Between us, it’s my secret weapon for busy days when I need something reliable.
- Budget-Friendly Staple: A single batch costs me pennies compared to store-bought GF bread, and the leftovers last forever in the freezer. The 1:1 blend means no fancy ingredients—just what you already have—and the yeast keeps it fresh longer than anything I’ve tried before.
Step-by-step instructions for gluten-free bread machine masterpiece
This gluten-free loaf delivers bakery-style texture and flavor without compromising structure—here's exactly how to make it happen.
Prepare the Gluten-Free Base with Precision
In a large mixing bowl, combine the 3.5 cups 1:1 gluten-free flour blend with the 0.5 tsp xanthan gum and 1 tbsp psyllium husk powder. Whisk vigorously for 2 minutes using a wire whisk to ensure these dry ingredients are thoroughly integrated—this prevents gummy texture later. The psyllium husk powder will form a gel-like consistency when hydrated, which mimics gluten's elasticity.
Add the 2 tbsp granulated sugar, 1.5 tsp active dry yeast, and 1.5 tsp salt to the dry mixture. Whisk again for 30 seconds until everything is evenly distributed. The sugar will help with browning, while the yeast and salt balance flavors. If using, finely chop the 1 tsp fresh rosemary or thyme and set aside for later—this adds aromatic depth that elevates the simple bread.
Create the Liquid Mixture for Optimal Hydration
In a separate measuring cup, combine the 1.25 cups warm water (test temperature with your finger—should feel like bathwater, around 110°F) with the 2 tbsp extra-virgin olive oil and 1 tbsp honey or maple syrup. Stir gently until fully incorporated. The olive oil provides moisture and richness, while the honey enhances browning and adds subtle sweetness that pairs beautifully with the herbs.
If using seeds, toast the 0.25 cup sunflower seeds or flaxseeds in a dry skillet over medium heat for 2-3 minutes until fragrant. This step intensifies their nutty flavor and prevents them from absorbing too much moisture during baking. Let them cool completely before adding to the bread mixture.
Combine Wet and Dry Ingredients in the Bread Pan
Pour the liquid mixture into your bread machine pan, then add the chopped herbs (if using) and toasted seeds. Sprinkle the dry ingredients over the top, creating a well in the center. This layering prevents the yeast from being exposed to too much dry flour initially, allowing it to activate properly in the liquid.
Scrape the sides of the pan to distribute everything evenly, then close the lid. Select the "Basic White Bread" setting on your bread machine (most machines have gluten-free options, but this setting works best for texture control). The machine will automatically mix, knead, and bake—just let it work its magic.
Monitor the Baking Process for Perfect Results
After 30 minutes of mixing, open the lid and check the dough. It should look shaggy but cohesive, with no dry spots. If it appears too dry, add 1 tablespoon warm water and mix briefly with a wooden spoon. The psyllium husk powder will help bind everything together despite the lack of gluten.
Continue baking until the bread reaches the end-of-cycle signal (typically 3 to 3.5 hours total). When done, remove the loaf immediately and place it on a wire rack to cool for at least 1 hour. This resting period allows the internal structure to set properly, preventing a gummy crumb.
Achieve Crusty Texture and Serve with Confidence
For an extra-crisp crust, brush the warm loaf with a mixture of 1 tablespoon melted butter and 1 teaspoon honey. This simple step enhances flavor and creates that coveted bakery-style exterior. Slice the bread while still slightly warm for the best texture—each slice should have a tender crumb with just enough chewiness to satisfy.
Store any leftovers in an airtight container at room temperature for 2 days, or freeze for up to 1 month. This gluten-free loaf holds up beautifully, making it perfect for sandwiches, toast, or French toast. The combination of psyllium husk powder and proper hydration ensures a result that rivals traditional wheat-based bread—without the gluten compromise.
Pro Tips For Making All Purpose Gluten Free Flour Bread Machine
- Mix the Psyllium First: Mix the psyllium husk powder with your warm water before adding it to the machine—this prevents clumping and ensures even distribution. I learned this the hard way when my first loaf turned out dense because the psyllium didn’t dissolve properly.
- Use Room-Temp Flour: Cold gluten-free flour blend makes the dough sluggish and gummy. Let it sit out for 30 minutes before mixing—just enough to wake up the starches and help the yeast work efficiently.
- Skip the Extra Xanthan: Your blend already includes xanthan gum, so don’t add more unless your recipe specifically calls for it. Too much makes the bread rubbery, and I’ve ruined three batches by doubling up.
- Check the Dough Early: Gluten-free dough rises faster than wheat dough—stop the machine after 15 minutes to check for volume. If it’s already doubled, pull it out to prevent overproofing, which flattens the crumb. (Yes, even if the machine says to keep going.)
Regional styles of this recipe
Italian Rustic Style
Transform your gluten-free loaf into a rustic Italian-inspired bread by adding 1 tsp dried oregano and ½ tsp garlic powder to the dry ingredients. Replace the sunflower seeds with ¼ cup chopped Kalamata olives for a Mediterranean twist.
Brush the baked loaf with 2 tbsp olive oil mixed with 1 tsp balsamic vinegar after baking for an authentic Italian finish. This variation pairs perfectly with antipasto platters or grilled meats. 🌿
Southern-Style Cornbread
For a Southern-inspired gluten-free cornbread, swap out 1 cup of the gluten-free flour blend for 1 cup fine cornmeal and add ½ cup shredded cheddar cheese to the dry ingredients. Replace the honey with 2 tbsp brown sugar and fold in ½ cup corn kernels during the final mixing step.
Bake in a greased loaf pan instead of the bread machine for a denser, cornbread-like texture. This version is ideal for serving with chili or BBQ. 🌽
Herb-Focused French Baguette
Create a gluten-free baguette-style loaf by reducing the water to 1 cup and adding 1 tbsp Dijon mustard to the liquid mixture. Sprinkle 1 tbsp chopped fresh parsley and 1 tsp dried tarragon into the dry ingredients.
After baking, use a serrated knife to score the loaf in a diagonal pattern before brushing with melted butter. This French-inspired version is perfect for dipping in olive oil or serving with charcuterie. 🥖
Cinnamon Swirl Sweet Loaf
For a gluten-free sweet bread, replace the granulated sugar with ¼ cup brown sugar and add 1 tbsp ground cinnamon to the dry ingredients.
Roll out ¼ cup cream cheese mixed with 2 tbsp softened butter and 2 tbsp sugar into a thin rectangle, then wrap it around the dough before placing it in the bread machine pan. This creates beautiful swirls when baked.
Serve warm with butter or as a French toast base. 🍯
Seeded Whole Grain
For a heartier loaf, replace 1 cup of the gluten-free flour blend with 1 cup certified gluten-free whole grain flour (like brown rice flour). Add ¼ cup chopped walnuts and 2 tbsp ground flaxseeds to the dry ingredients.
Toast the walnuts and flaxseeds together in a dry skillet for 2-3 minutes before mixing. This version has a nutty flavor and extra fiber, perfect for hearty sandwiches or toast. 🌾
Savory Cheese & Onion
Elevate your loaf with a savory twist by adding ½ cup shredded Gruyère cheese and 2 tbsp finely chopped red onion to the dry ingredients. Caramelize the onions in 1 tbsp butter for 5 minutes before mixing with the other ingredients.
Sprinkle an additional ¼ cup shredded cheese on top before baking. This rich, savory loaf is ideal for serving with soups or as a cheese board base. 🧀
Nutrition facts
Frequently asked questions
Can I use any gluten-free flour blend in this recipe?
A 1:1 gluten-free flour blend (containing rice flour, potato starch, and tapioca starch) works best, but avoid single-ingredient flours like almond or coconut flour—they lack the starch balance needed for bread machine success. If your blend lacks xanthan gum, add 0.5 tsp separately; it's essential for structure. Brands like Bob's Red Mill or King Arthur perform consistently.
Why does my gluten-free dough look shaggy in the bread machine?
This is completely normal! Gluten-free dough lacks the elastic gluten proteins that create smooth, stretchy dough. The psyllium husk powder and xanthan gum work together to bind the ingredients, but the texture will appear dry and rough. Don't add extra water—this disrupts the psyllium's gelling properties. The final loaf will have a satisfying chewiness despite the initial appearance.
How do I know when the gluten-free bread is fully baked?
Look for three key signs: the internal temperature should reach 190-200°F, the crust should be golden brown, and the bread should sound hollow when tapped on the bottom. Most bread machines signal completion automatically, but gluten-free loaves sometimes need 10-15 extra minutes. Remove it when the top springs back when gently pressed.
Can I make this recipe without a bread machine?
Yes, but with adjustments! Mix the ingredients as directed, then let the dough rest for 1 hour before shaping into a loaf pan. Bake at 350°F for 45-55 minutes, covering loosely with foil after 25 minutes to prevent over-browning. The texture will be slightly denser, but still delicious. For best results, use a Dutch oven for that bakery-style crust.
What's the best way to store gluten-free bread machine bread?
Cool completely, then wrap in an airtight container or plastic wrap. At room temperature, it stays fresh for 2-3 days, while refrigeration extends shelf life to 5-7 days. For longer storage, slice and freeze portions—toast straight from frozen for crispy results. The crust gets crunchier as it cools, so slice when still slightly warm for the best texture.