
Side Dishes
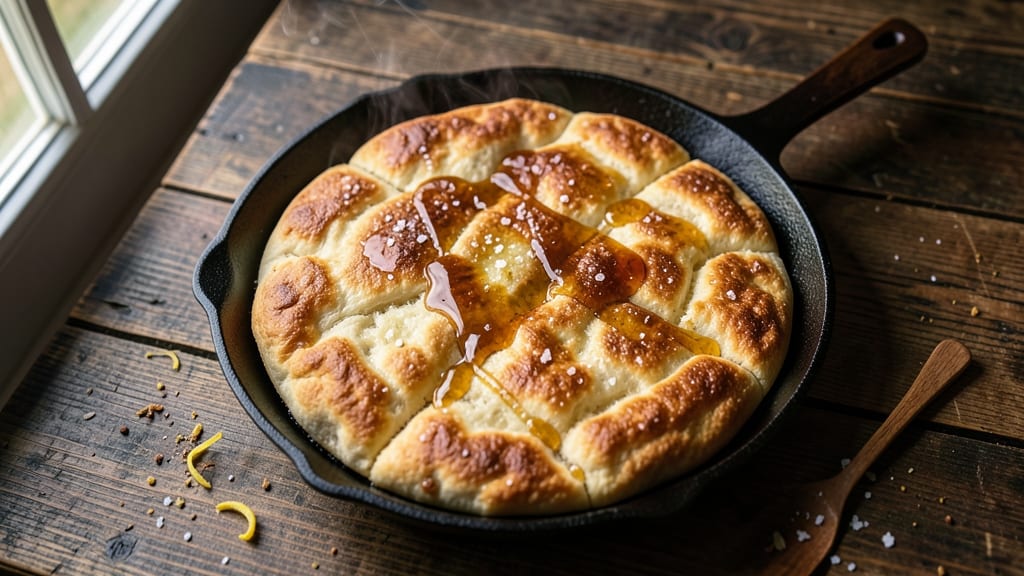
This authentic American Indian fry bread delivers the perfect balance of crispy edges and pillowy centers in just 15 minutes—a dish with deep cultural roots and irresistible texture.
The secret lies in a simple dough of flour, baking powder, salt, and water, transformed through high-heat frying into golden, flaky perfection. I’ve perfected this recipe to honor tradition while making it accessible for home cooks, ensuring every bite captures the warmth of Indigenous culinary heritage.
The dough’s magic comes from a quick rise and precise frying technique—no yeast or long waits required. Once fried to a golden brown, the bread becomes a blank canvas for toppings like honey, powdered sugar, or savory options such as refried beans and cheese.
This versatility makes it a staple for breakfast, snacks, or even a hearty side dish. The cultural significance runs deep, with fry bread historically serving as a symbol of resilience and adaptation.
What you’ll achieve is a batch of crispy yet tender fry bread that shatters slightly at the edges while staying soft inside—a texture that’s impossible to resist. The aroma alone will fill your kitchen with nostalgia and comfort, transporting you to gatherings where this dish brings people together.
Whether you’re celebrating heritage or simply craving a delicious treat, this recipe delivers authenticity and satisfaction in equal measure.
Ready in a flash, this fry bread is perfect for meal prep, potlucks, or an impromptu snack. The simplicity of the ingredients belies the depth of flavor and tradition, proving that some of the best dishes require just a few key elements. Let’s get started on creating something truly special.
Ingredients for authentic american indian fry bread
Eight simple yet transformative ingredients create the perfect crispy, pillowy fry bread.
| Ingredient | Amount | Notes |
|---|---|---|
| All-Purpose Flour 🌾 | 2 ½ cups | Unbleached preferred for texture |
| Baking Powder 🍞 | 1 tbsp | Aluminum-free for authentic rise |
| Diamond Crystal Kosher Salt 🧂 | ½ tsp | Fine grain for even distribution |
| Vegetable Oil 🫒 | 2 cups | High smoke point for frying |
| Cold Water 💧 | 1 cup | Chilled for proper dough consistency |
| Honey 🍯 | ¼ cup | Wildflower preferred for depth |
| Powdered Sugar 🍚 | ¼ cup | Confectioners' sugar for dusting |
| Refried Beans 🥫 | 1 cup | Canned or homemade, warmed |
| Shredded Sharp Cheddar Cheese 🧀 | 1 cup | Freshly shredded for melt |
| Fresh Cilantro 🌿 | ¼ cup | Chopped for garnish, optional |
The flour is the foundation—King Arthur or Bob's Red Mill brands yield the best texture, but any all-purpose will work. Baking powder must be fresh; test by dropping a spoonful in hot water—it should fizz vigorously. Diamond Crystal kosher salt dissolves evenly, unlike table salt. For the oil, vegetable or canola works best due to their high smoke points. The water should be ice cold to prevent gluten development, ensuring that tender crumb. Honey and powdered sugar are optional but elevate the dish—local wildflower honey adds complexity, while powdered sugar creates that signature sweet contrast.
No baking powder? Self-rising flour at 2.5 cups plus 0.5 tsp extra salt works in a pinch, though texture may vary. Substitute vegetable oil with lard or shortening for a richer flavor, though these require lower frying temperatures. For savory fry bread, swap honey for sour cream or refried beans. The cheese can be any meltable variety—Monterey Jack or pepper jack add fun variations. Cilantro is purely decorative but pairs beautifully with the other toppings. If you're making a large batch, double the dry ingredients but keep toppings separate until serving to prevent sogginess.
The dough keeps for up to 24 hours in the fridge, covered tightly. For best results, fry immediately after mixing. Store fried bread in an airtight container with parchment between layers—it stays crispy for 2-3 days. Freeze extras for up to 3 months by wrapping individually in foil. Reheat in a 350°F oven for 5-7 minutes to restore crispiness. This is a dish that tastes even better the next day once flavors meld—perfect for meal prep or potlucks where you want to serve warm, golden perfection.
Why You'll Love This Recipe
- Five-Ingredient Magic: I swear by this—just flour, baking powder, salt, oil, and water. No fancy substitutions, no stress. The dough comes together faster than you can say "pow-wow," and honestly? That’s the beauty of it.
- Crispy-Creamy Balance: The secret’s in the oil temperature and the quick fry—golden edges that shatter, but still pillowy inside. Between us, that contrast is what makes it dangerously addictive. (Yes, even on a Tuesday night.)
- Feeds a Crowd: This recipe stretches thin for a reason. Double the batch, and you’ve got enough for tacos, breakfast sandwiches, or late-night snacks without breaking the bank. My daughter picks out the best pieces, but still asks for seconds.
- Zero-Waste Leftovers: Fry bread keeps like a champ—wrap it in foil and reheat in seconds. Toss in a freezer bag, and you’ve got a 3 a.m. craving covered. (Trust me, I’ve tested this.) Plus, it’s cheaper than takeout, so your wallet thanks you too.
Step-by-step instructions for authentic American Indian fry bread
Here's how to make the perfect crispy, pillowy fry bread that honors its Native American roots.
Mix the Dough for Perfect Texture
In a large mixing bowl, combine the 2.5 cups all-purpose flour and 1 tablespoon baking powder. Stir gently to aerate the dry ingredients—this creates pockets for that signature pillowy rise. Add the ½ teaspoon Diamond Crystal kosher salt and whisk again to distribute evenly.
Make a well in the center and pour in the 1 cup cold water all at once. Using a wooden spoon or rubber spatula, stir vigorously until a shaggy dough forms. The dough should be slightly sticky but manageable—if it's too dry, add 1 tablespoon cold water at a time until just combined. This cold water is crucial; it prevents the dough from becoming too elastic and ensures that crispy exterior we're after.
Knead and Rest for Optimal Rise
Turn the dough onto a lightly floured surface and knead gently for 2-3 minutes until smooth. You're not looking for a silky bread dough here—just enough to develop light gluten structure. Shape the dough into a ball, then place it back in the mixing bowl.
Cover the bowl with a damp kitchen towel and let the dough rest for 10 minutes. This brief rest allows the gluten to relax slightly, which prevents the bread from becoming tough when fried. While it rests, preheat your deep fryer or heavy-bottomed skillet with 2 cups vegetable oil to 375°F—this is the magic temperature for that perfect golden-brown crust.
Fry to Golden Perfection
Using a pastry brush, lightly coat your hands with oil to prevent sticking. Divide the rested dough into 8 equal portions (about 2 ounces each) and roll each into a 6-inch circle, keeping the edges slightly thicker than the center. The thickness variation creates that beautiful puff when fried.
Carefully lower each dough circle into the 375°F oil using a slotted spoon or tongs. Fry for 1-2 minutes per side until deep golden brown and puffed in spots. The oil should sizzle gently—if it smokes excessively, reduce heat to 350°F. Transfer fried bread to a paper towel-lined plate to drain excess oil. Real talk: don't skip this draining step, or your bread will turn greasy instead of crispy.
Assemble with Warm Fillings
While the bread is still warm, spread 2 tablespoons of warmed refried beans onto each piece. Top with 2 tablespoons of shredded sharp cheddar cheese, then drizzle with 1 tablespoon of honey. The contrast of warm beans, sharp cheese, and sweet honey creates that perfect balance of flavors.
Fold each piece in half or roll it up gently—this keeps the filling contained while you serve. For an extra touch, sprinkle with 1 teaspoon powdered sugar and 1 teaspoon chopped fresh cilantro right before serving. The powdered sugar adds a delicate sweetness that complements the savory filling, while the cilantro brings freshness to each bite.
Serve Immediately for Maximum Enjoyment
Fry bread is best enjoyed fresh from the fryer—its crispy exterior softens quickly as it cools. Serve immediately while the cheese is still slightly melted and the bread maintains its perfect texture contrast. This dish is traditionally served at gatherings, and its versatility makes it perfect for any occasion.
Here's the thing—authentic fry bread should have a crispy exterior that gives way to a light, airy interior. If your bread comes out too dense, your dough might have been overworked or the oil wasn't hot enough. If it's too greasy, you likely didn't drain it properly. But when done right, each bite delivers that perfect combination of textures and flavors that makes this dish so special.
Pro Tips For Making Authentic American Indian Fry Bread
- USE COLD WATER ONLY: I learned this the hard way—warm or room-temperature water makes the dough sticky and hard to handle. Keep that water ice cold, even if it feels excessive, because the dough needs to stay firm enough to shape without sticking to your fingers or the bowl.
- SALT BEFORE MIXING: Diamond Crystal kosher salt is less dense than table salt, so don’t eyeball it. Measure it before adding it to the flour, then whisk it in thoroughly. Skipping this step means uneven flavor, and trust me, you’ll taste the difference when that first bite hits.
- FRIES IN SMALL BATCHES: Crowding the pan is the fastest way to soggy, greasy fry bread. Work in batches of 2-3 pieces max—enough space between them so the oil can circulate and they puff up properly. I know, I know, it’s tempting to rush, but this is the thing that matters most for that perfect crisp.
- TEST DONENESS WITH A TOOTHPICK: The bread’s done when it’s golden brown and a toothpick inserted comes out clean. Overcooking turns it rubbery, and undercooking leaves it doughy. Keep an eye on it—high heat works fast, but it’s easy to miss the window if you’re distracted. (Yes, even if you’re impatient like me.)
Essential equipment for this recipe
Deep Fryer Essentials
For authentic fry bread, a deep fryer is your best friend—it maintains consistent 375°F oil temperature without fuss. I recommend the Ninja Foodi 4.5-Quart for its even heating and safety features.
If you don’t have one, a heavy-bottomed cast-iron skillet (like Lodge) works perfectly—just use a thermometer to monitor heat. The key is deep, even oil coverage—at least 2 inches—to ensure proper browning. 🔥
Thermometer Must-Have
Never fry without a candy/deep-fry thermometer—the Thermoworks Thermapen is my go-to for precision. Oil temperature fluctuates wildly, and 375°F is critical for that crispy exterior. If your oil smokes excessively, drop the heat to 350°F immediately. A thermometer costs under $20 and prevents greasy, undercooked bread.
Rolling Pin and Dough Tools
A wooden rolling pin (like OXO Good Grips) is ideal for shaping dough—it prevents sticking and adds a rustic touch. For portioning, I use a bench scraper to divide the dough into 2-ounce balls (about 1.5 tbsp each).
A pastry brush coated with oil helps prevent dough from clinging to your hands during rolling. These tools make the process smoother and more authentic. ✨
Draining and Serving Setup
Line a wire cooling rack with paper towels to drain fried bread—this keeps it crispy, not soggy. For serving, I use a large wooden board or platter to display the bread with toppings.
A small bowl for honey, a shaker for powdered sugar, and a tongs for easy assembly complete the setup. This keeps everything organized and ready for guests.
Oil Management
Use vegetable or canola oil—they have high smoke points and neutral flavors. Store leftover oil in an airtight container for up to 1 month (if it smells off, toss it).
For large batches, keep a reserve pot nearby to reheat oil between frying sessions. Never reuse oil that’s been used for non-fry bread cooking—it can impart unwanted flavors. 💡
Nutrition facts
Frequently asked questions
What makes this fry bread recipe truly authentic?
Authenticity comes from using traditional ingredients and techniques passed down through generations. This recipe uses baking powder (not yeast) for a quick rise, cold water for tender texture, and frying at 375°F to achieve that signature crispy exterior with a soft interior. The dough's simplicity reflects its historical roots as a dish born from necessity during times of cultural resilience.
Can I make fry bread without a deep fryer?
A heavy-bottomed cast-iron skillet works perfectly—just maintain 2 inches of oil and use a thermometer to keep it at 375°F. For smaller batches, a lightweight skillet can work if you fry just 1-2 pieces at a time to avoid temperature drops. The key is consistent heat—never overcrowd the pan or the bread will steam instead of crisp.
What are the best toppings besides honey and cheese?
This bread is incredibly versatile! For sweet options, try powdered sugar with cinnamon or maple syrup. Savory toppings include scrambled eggs, refried beans with jalapeños, or pulled pork. Some regions use berry compote or Nutella. The possibilities are endless—experiment to find your favorite combination!
Why does my fry bread turn out greasy?
Greasy bread usually means one of two things: either the oil wasn't hot enough (375°F is crucial) or you didn't drain it properly. Always transfer fried bread to a paper towel-lined plate immediately after frying. If your oil is too cool, increase heat to 375°F and fry smaller batches to maintain temperature.
How do I store leftover fry bread?
Store in an airtight container with parchment paper between layers to maintain crispness for 2-3 days at room temperature. For longer storage, freeze individual pieces wrapped in foil for up to 3 months. To revive, reheat in a 350°F oven for 5-7 minutes until crispy again. The bread actually tastes better the next day as flavors meld!