
Side Dishes
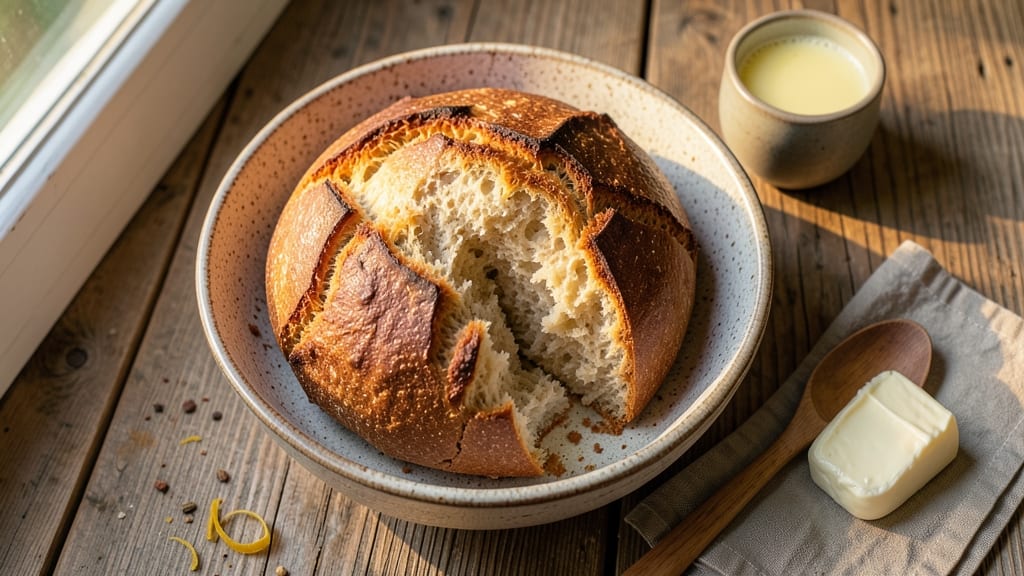
This Australian soda bread recipe delivers the perfect balance of a buttery crust and tangy depth—no yeast, no fuss, just rustic perfection. I’ve baked countless loaves, and this version consistently produces a tender crumb with a golden, crackly exterior that’s impossible to resist.
The secret lies in the buttermilk and baking soda, which create that signature tang and lift without needing yeast.
What makes this recipe special is its simplicity and versatility. With just five core ingredients and 30 minutes of prep, you’ll have a loaf ready for dinner or a cozy snack. The bread stays fresh for days, making it ideal for meal prep or gifting.
Plus, you can customize it with seeds, herbs, or cheese for added texture and flavor—no compromises on tradition.
By the time it emerges from the oven, you’ll have a loaf with a crisp crust that shatters slightly and a moist, slightly dense interior that’s perfect for slathering with butter or pairing with soups.
The aroma alone will have everyone gathering around the table, and the taste? Pure comfort food nostalgia in every bite.
Whether you’re serving it warm with jam or saving slices for toast the next morning, this soda bread is a game-changer for any kitchen. Let’s get baking—your kitchen will smell like home in no time.
Ingredients for australian soda bread
Five simple ingredients plus optional toppings—this is your go-to rustic loaf.
| Ingredient | Amount | Notes |
|---|---|---|
| All-Purpose Flour 🌾 | 3 ½ cups | Unbleached preferred for lighter crumb |
| Buttermilk 🥛 | 1 ¼ cups | Full-fat for best flavor |
| Baking Soda 🧂 | 1 tbsp | Freshly opened for potency |
| Salt 🧂 | 1 tsp | Fine sea salt preferred |
| Unsalted Butter 🧈 | ½ cup | Cold, cubed for crust |
| Milk 🥛 | ¼ cup | Room temperature for mixing |
| Sesame Seeds 🌱 | 2 tbsp | Optional for classic texture |
| Fresh Rosemary 🌿 | 1 tbsp | Chopped, or dried thyme |
The buttermilk is non-negotiable here—it’s what gives that signature tang. Store-bought works fine, but homemade (milk + vinegar) takes it to the next level. For the flour, King Arthur or Bob’s Red Mill are my go-tos—they bake up lighter. The baking soda needs to be fresh; if it’s been sitting in your pantry for months, grab a new box. For the butter, Plugrá or Land O’Lakes are reliable, but any unsalted will do. I always grab extra butter because it’s worth the little splurge for that perfect crust.
No buttermilk? Mix 1 cup milk + 1 tbsp vinegar and let it sit for 5 minutes. Short on rosemary? Dried thyme or parsley works just as well. The sesame seeds are optional, but they add that classic crunch—Trader Joe’s has them pre-portioned in little bags if you’re lazy. For extra richness, swap half the milk for heavy cream. And if you’re feeling fancy, add 1/4 cup grated Parmesan to the dough for a cheesy twist. The bread’s texture is forgiving, so don’t stress over exact measurements—eyeball it if you’re comfortable.
This bread stays fresh for 3-4 days at room temperature, wrapped in a towel. For longer storage, freeze slices wrapped in parchment—3 months no problem. I always bake an extra loaf and freeze half; it’s perfect for quick toast or sandwiches later. The crust gets even crunchier the next day, so if you can resist eating it fresh out of the oven, wait. And if you’re gifting? Wrap it in parchment and twine—it’s a crowd-pleaser every time.
Why You'll Love This Recipe
- No Mixer Needed: Mixing this dough is almost meditative—just flour, buttermilk, and a pinch of baking soda. No kneading, no fuss, just fold until it holds. My hands are always sticky, but the result? Always perfect.
- Tangy Butter Magic: That buttermilk makes it tangy, while the butter—just a pat on top—creates a golden crust that cracks open like a treasure chest. Honestly, the first bite is why I keep making it.
- Breakfast to Picnic: Toast it for breakfast, tear it with soup, or pack slices for a picnic. It’s my go-to for lazy mornings or last-minute gatherings. No one ever turns down a slice of this.
- Stays Fresh for Days: Bake a loaf, and it’ll last a week in a bag. Freeze the extras, and they toast up like they’re fresh. Between us? I’ve had it cold with jam at 2 AM—still delicious.
Step-by-step instructions for Australian soda bread
Here's how to create that signature buttery crust and tangy crumb—simple steps for perfect results.
Prepare the Dough with Cold Butter
In a large mixing bowl, combine the 3.5 cups all-purpose flour, 1 tablespoon baking soda, and 1 teaspoon salt. Gently stir to distribute the dry ingredients evenly. Add the 0.5 cup cold cubed unsalted butter to the flour mixture and use your fingertips to work it in until the butter is fully incorporated and resembles coarse crumbs. Cold butter is key here—it creates those beautiful flaky layers when baked.
Next, make a well in the center of the bowl and pour in the 1.25 cups buttermilk and 0.25 cup milk. The buttermilk should be at room temperature for best results. Using a wooden spoon or spatula, gently mix the wet ingredients into the flour mixture, stirring just until a shaggy dough forms. Avoid overmixing—this can make the bread dense. The dough should be soft but not sticky; if it's too wet, add an extra tablespoon of flour.
Fold in Herbs and Shape the Loaf
Add the 1 tablespoon chopped fresh rosemary to the dough and gently fold it in with your hands or a spatula. The rosemary adds a subtle earthy aroma that pairs beautifully with the buttermilk tang. If you're using the optional 2 tablespoons sesame seeds, sprinkle them evenly over the dough and fold them in as well. This step is where the bread gets its signature texture and flavor.
Turn the dough out onto a lightly floured surface and gently shape it into a round loaf, about 8 inches in diameter. Don't worry if it's not perfectly smooth—this bread is rustic by nature. Place the shaped dough on a parchment-lined baking sheet or directly on your baking tray. The key here is to keep the dough compact and slightly domed to ensure even baking. If the dough feels too sticky, wet your hands slightly to prevent it from sticking to the surface.
Create the Signature Cross Slash
Using a sharp serrated knife or a razor blade, score the top of the dough with a deep cross, about ½ inch wide. This isn't just for looks—it helps the bread expand evenly as it bakes and prevents it from cracking unpredictably. Press down firmly but gently to ensure the cut goes all the way through the crust. The cross should be centered and symmetrical for that classic Australian soda bread appearance.
Here's the thing—don't overthink the depth of the cut. You want it deep enough to allow the bread to rise slightly in the oven but not so deep that it collapses. If you're nervous about the cut, practice on a separate piece of dough first. The cross should look like a plus sign (+) when viewed from above, creating four equal sections that will rise beautifully.
Bake Until Golden and Hollow-Sounding
Preheat your oven to 400°F and place a baking tray filled with water on the lower rack—this creates steam that helps develop that perfect crust. Bake the bread for 35-40 minutes, until the top is deep golden brown and the internal temperature reaches 190-200°F. The bread is done when it sounds hollow when tapped on the bottom—this is your best indicator of doneness.
I like to check for doneness at the 35-minute mark because ovens vary. If the top is browning too quickly, tent the bread loosely with aluminum foil to prevent over-browning while it continues to bake through. The bread should be firm to the touch but still slightly soft in the center. Resist the urge to open the oven door before this time—sudden temperature drops can cause the bread to collapse.
Cool and Serve for Maximum Flavor
Remove the bread from the oven and transfer it to a wire rack to cool completely. This is crucial—serving it warm from the oven will give you a soft texture, but letting it cool for at least 1 hour allows the crumb to set and the flavors to develop fully. The crust should be crisp and buttery, while the interior remains tender and slightly tangy from the buttermilk.
For the best experience, slice the bread when it's at room temperature. The contrast between the crispy crust and the soft, airy interior is what makes this bread so special. Store any leftovers wrapped in a clean kitchen towel to keep it fresh for up to 3 days, or freeze slices for up to 3 months. This bread is perfect for breakfast with butter, or toasted with jam for a classic Aussie treat.
Pro Tips For Making Australian Soda Bread
- MEASURE BUTTERMILK PRECISELY: I learned this the hard way—using "about" a cup of buttermilk leads to a dense, gummy loaf. Weigh it instead: 240 grams (or ~250ml) gives the right tang and moisture without overdoing it. That extra 10 grams makes all the difference when the baking soda reacts.
- DON’T SKIP THE BUTTER MELT: Cold butter in the dough? Big mistake. Rub it into the flour until it’s pea-sized crumbs—no bigger. Then let the dough sit for 10 minutes while you preheat the oven. This ensures even distribution so every bite has that rich, flaky texture, not a greasy surprise.
- CHECK DONENESS BY SOUND: A toothpick test is overrated. Tap the loaf firmly—if it sounds hollow (like a drum) and the bottom isn’t sticking to the pan, it’s done. Overbaking dries it out; underbaking leaves it gummy. Trust your ears more than your eyes.
- UPGRADE WITH A HOT PAN: Skip the parchment paper. Heat your baking dish for 2 minutes in the oven first, then pour in the dough. The extra heat at the start creates a crisp crust right away, and you won’t waste time waiting for the pan to heat up mid-bake. (Yes, it’s worth the extra step.)
Serving suggestions for this australian soda bread
Classic Aussie Pairings
Serve your soda bread warm with butter straight from the fridge—its cool richness melts beautifully against the crust. For a true Aussie experience, pair it with Vegemite on buttered toast (just a thin layer—this bread handles it better than soft breads). The buttermilk tang balances the salty umami perfectly. 🥖
Soup and Stew Companions
This bread is legendary with hearty soups like minestrone or Irish stew. The crust soaks up broth while the interior stays tender. I always bake an extra loaf when making lentil soup—it’s the ultimate comfort combo.
For a lighter option, try it with tomato basil soup and a sprinkle of Parmesan.
Breakfast Star
Toast thick slices with brown butter and top with sliced bananas or peanut butter for a no-fuss breakfast. The crust holds up beautifully to griddled bacon or sausages, making it a weekend brunch hero.
Pro tip: Warm the bread in a 350°F oven for 5 minutes before toasting to revive that crispy texture. ✨
Cheese Board Essential
Use this bread as a base for cheese boards—its sturdy crust holds up to sharp aged cheddar, creamy brie, and tangy blue cheese. Add cured meats like prosciutto or salami, plus fig jam or honey for sweet contrast.
The rosemary in the bread adds an herbal note that elevates the whole spread.
Jam and Tea Pairing
No Aussie kitchen is complete without jam and tea. Spread raspberry jam or strawberry preserve on warm slices and serve with Earl Grey or chamomile tea.
For a savory twist, try chutney with sharp cheddar—it’s a pub-style classic. The bread’s tangy crumb soaks up flavors beautifully, making every bite a little celebration. 🍯
Meal Prep Hack
Slice the bread while still warm and store in an airtight container with a paper towel to keep it crisp. Reheat slices in a toaster oven at 375°F for 2-3 minutes to restore that golden crust.
Pack with butter packets and jam for a grab-and-go breakfast. It’s my go-to for lunchboxes or picnic baskets—always a hit! 🧺
Nutrition facts
Frequently asked questions
Why does Australian soda bread need a cross cut?
The cross cut isn't just decorative—it helps the bread rise evenly and prevents random cracks. When baked, the steam escapes through the cuts, creating that signature golden crust. Press firmly to make the cut go all the way through the dough for best results.
Can I make this bread without buttermilk?
Mix 1 cup milk + 1 tablespoon vinegar and let it sit for 5 minutes to create a buttermilk substitute. The tang is essential for that classic flavor, so don't skip it. For extra richness, you could also use 1 cup plain yogurt instead.
How do I know when the bread is fully baked?
Your bread is done when it's deep golden brown and sounds hollow when tapped on the bottom. The internal temperature should reach 190-200°F. If the top browns too quickly, tent with foil to prevent over-browning while it finishes baking.
What can I do with leftover soda bread?
Slice and freeze for up to 3 months, or store wrapped in a towel for 3-4 days. Toast frozen slices in a 375°F oven for 5 minutes to revive the crust. It's perfect for French toast, croutons, or even breadcrumbs for meatballs!
Can I add cheese to this recipe?
Yes! For a cheesy version, fold in ½ cup grated Parmesan with the herbs. Sharp cheddar or feta work well too. Just reduce the milk by 2 tablespoons to maintain the right dough consistency. The cheese adds wonderful flavor but may slightly shorten the shelf life.