
Side Dishes
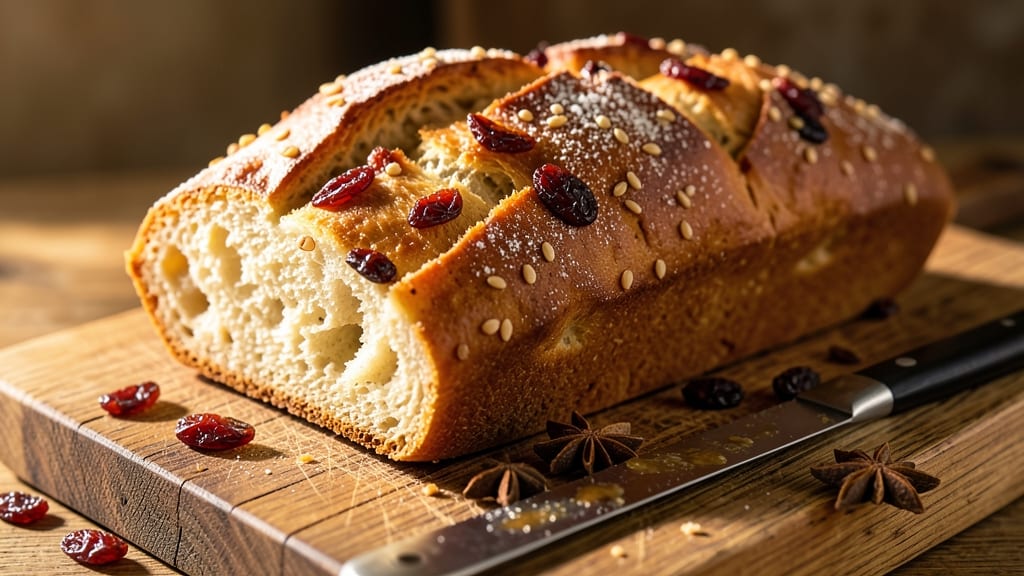
This Asian raisin bread recipe transforms your kitchen into a fragrant bakery with its signature sweet swirls and golden crust. 🌟 The secret lies in balancing traditional yeast dough with plump raisins and warm spices like cinnamon, creating a texture that's tender yet sturdy enough for slicing.
I've perfected this recipe over years of baking, ensuring every batch delivers that irresistible aroma and melt-in-your-mouth crumb.
The dough starts with a simple yet flavorful base of all-purpose flour, yeast, and milk, enriched with butter for that signature buttery richness. Raisins are soaked in warm water to plump them up, while a cinnamon-sugar mixture creates those iconic swirls that make this bread so special.
The key to success? Proper kneading and proofing—this ensures a light, airy texture that's perfect for slicing and toasting.
By the time it emerges from the oven, you'll have a loaf with a crisp, golden crust and tender, slightly sweet crumb studded with juicy raisins. The aroma alone will have everyone gathering around your table, and the taste—warm, buttery, and just sweet enough—makes it a crowd-pleaser.
This bread is equally delicious toasted with butter, slathered with jam, or enjoyed fresh out of the oven.
Whether you're baking for a family gathering or treating yourself to a homemade indulgence, this recipe delivers restaurant-quality results with minimal effort. The best part? It's versatile enough to serve as a side dish, breakfast treat, or even a dessert when paired with ice cream.
Let's get started on creating your perfect loaf.
Ingredients for asian raisin bread
These simple yet fragrant ingredients create the perfect Asian raisin bread with golden swirls and tender crumb.
| Ingredient | Amount | Notes |
|---|---|---|
| All-Purpose Flour 🌾 | 4 ½ cups | Spooned and leveled for accuracy |
| Active Dry Yeast 🍞 | 2 ¼ tsp | One packet for convenience |
| Granulated Sugar 🍚 | ¼ cup | For dough and cinnamon mixture |
| Unsalted Butter 🧈 | ½ cup | Cold, cubed for dough |
| Whole Milk 🥛 | ¾ cup | Warmed to 110°F |
| Large Eggs 🥚 | 1 whole | Room temperature |
| Raisins 🍇 | 1 ½ cups | Plump, seedless preferred |
| Ground Cinnamon 🌿 | 2 tbsp | Freshly ground for warmth |
| Salt 🧂 | 1 tsp | Diamond Crystal preferred |
| Vanilla Extract 🍯 | 1 tsp | Pure vanilla for flavor |
| Honey 🍯 | 2 tbsp | For raisin soaking |
| Vegetable Oil 🫒 | 2 tbsp | For greasing bowl |
The raisins are the star here, so plumpness is key. Soak them in warm water with honey for at least 30 minutes before using—this ensures they stay juicy and sweet in the finished loaf. For the flour, King Arthur or Gold Medal brands work best, giving that perfect balance of structure and tenderness. The butter? Cold cubes are non-negotiable—this ensures flaky layers in the dough. I always grab my butter from Whole Foods for that rich, creamy texture, but any high-quality unsalted brand will do. The cinnamon should be freshly ground if possible—pre-ground loses its warmth fast.
No raisins? Dried cranberries or chopped dates work in a pinch (reduce soaking time to 15 minutes). Short on butter? Coconut oil or shortening keeps the dough workable, though the flavor won't be quite the same. The vanilla extract can be swapped for vanilla bean paste if you're feeling fancy—just use half the amount. For the milk, whole milk gives the best texture, but 2% or even almond milk works if that's what you've got. The yeast is the magic ingredient—make sure it's fresh (test it in warm water with a pinch of sugar—it should foam in 5-10 minutes). If your dough isn't rising, your yeast might be dead.
This dough is best made fresh, but you can prep it up to 24 hours ahead—just let it rise overnight in the fridge. The raisins keep well in the fridge for 3 months if stored in an airtight container with a bit of oil to prevent drying. The finished loaf stays fresh for 3 days at room temperature or 1 week in the fridge. For extra crispiness, wrap cooled slices in parchment paper and freeze—perfect for quick toast. The aroma alone will have everyone thinking you're a professional baker.
Why You'll Love This Recipe
- No-Knead Magic: I swear by this trick—just mix the dough, let it rise, and bake. The butter and milk make it tender without a single punch or roll. My lazy Sunday mornings now include fresh bread, no gym required.
- Sweet-Savory Balance: That caramelized sugar from the raisins? It’s like a little hug in every bite. The butter keeps it rich but not heavy, and the yeast gives it just enough chew to feel real—not that sad, dry store-bought stuff.
- Breakfast to Snack: Honestly, this bread is my secret weapon. Toast it for breakfast, pack slices for lunch, or serve warm with jam at a brunch. It’s the one loaf that does it all—no boring leftovers here.
- Pantry Staple Power: Between us, this recipe uses things you already have. Flour, yeast, butter—no fancy ingredients, just good basics. And a loaf lasts forever—freeze slices for toast or crumbs for baking. Zero waste, all win.
Step-by-step instructions for Asian raisin bread
Here's how to create those fragrant, buttery swirls with a perfect balance of sweet and spice.
👨🍳 Step 1: Soak and Prepare the Raisins
In a small bowl, combine the 1.5 cups raisins with the 2 tbsp honey and 0.25 cup granulated sugar. This mixture should look glossy and slightly sticky—if it's too dry, add 1 teaspoon warm water to help the raisins plump up. Let this sit for 15-20 minutes while you prepare the dough. The raisins should be moist and tender when done, not dry or crunchy. This soaking step is crucial—it prevents them from staying hard in the finished bread.
While the raisins soak, warm the 0.75 cup whole milk to 110°F in the microwave or on the stove. You're aiming for a temperature that's warm to the touch but not hot enough to cook the egg later. This warm milk will help activate the yeast and create a tender crumb. Test the temperature by dipping your finger in—it should feel pleasantly warm, not scalding.
👨🍳 Step 2: Mix the Dough and First Rise
In the bowl of a stand mixer fitted with the dough hook attachment, combine the 4.5 cups all-purpose flour, 2.25 tsp active dry yeast, 1 tsp salt, and 1 tsp vanilla extract. Mix on low speed for 30 seconds just to distribute the ingredients evenly. Add the 0.5 cup cold unsalted butter, cut into small cubes, and mix until the butter is fully incorporated and the mixture resembles coarse crumbs.
With the mixer running on low speed, gradually add the warm milk and 1 whole large egg. Mix for 2-3 minutes until the dough begins to come together. If it's too sticky to handle, add 1 tablespoon of flour at a time until it forms a soft, slightly tacky ball. The dough should be smooth but not stiff—press your finger into it; it should spring back slowly, not immediately. This is the ideal consistency for a tender loaf.
🥘 Step 3: Knead and Shape the Dough
Switch your mixer to medium speed and knead the dough for 5-7 minutes until it's smooth and elastic, pulling away from the sides of the bowl. You'll know it's ready when it forms a "windowpane" when stretched thin—hold it up to the light and you should see through it without tearing. If the dough feels too sticky, add 1 more tablespoon of flour; if it's too dry, add 1 teaspoon of warm milk. Shape the dough into a ball, place it in a lightly greased bowl, and cover with a damp kitchen towel.
Let the dough rise in a warm place for 1-1.5 hours, or until it has doubled in size. You'll see bubbles forming on the surface and the dough will feel light and airy when pressed gently with one finger. The kitchen should smell subtly sweet—this is the yeast doing its job. If your kitchen isn't warm enough, place the bowl near a turned-off oven with the light on or use a proofing box. Patience here is key; rushing the rise will make your bread dense.
🍳 Step 4: Layer and Swirl the Filling
Once the dough has risen, punch it down to release the air, then roll it out on a lightly floured surface into a 12x16-inch rectangle about ¼-inch thick. Spread the soaked raisins evenly over the dough, leaving a ½-inch border around the edges. In a small bowl, mix the 2 tbsp ground cinnamon with 1 tablespoon of the reserved granulated sugar, then sprinkle this mixture evenly over the raisins. The cinnamon should look like a dusting of warm brown sugar across the surface.
Starting from the long side, tightly roll the dough into a log, pinching the seam to seal. Cut the log in half lengthwise and twist the two halves together to form a swirled loaf. This classic Asian raisin bread technique creates those beautiful, intricate patterns when sliced. Place the loaf seam-side down in a 9x5-inch loaf pan that's been lightly greased with 2 tbsp vegetable oil. Cover with a damp towel and let it rise for another 30-45 minutes, until it's just about to overflow the pan.
🔥 Step 5: Bake to Golden Perfection
Preheat your oven to 350°F. Bake the bread for 35-40 minutes, until the top is deep golden brown and the internal temperature reaches 190°F when measured with an instant-read thermometer. The bread should pull away slightly from the sides of the pan, and it will smell incredibly fragrant—like warm cinnamon, buttery dough, and caramelized raisins. If the top browns too quickly, tent the pan with aluminum foil to prevent over-browning.
Remove the bread from the oven and let it cool in the pan for 10 minutes, then transfer it to a wire rack to cool completely. This resting time is important—it allows the steam inside to redistribute, preventing a gummy texture. Once cooled, slice into ½-inch thick pieces to reveal those beautiful swirls of cinnamon and raisin. The crust should be buttery and crisp, while the interior remains soft and tender. Store any leftovers wrapped in plastic at room temperature for up to 3 days, or freeze for longer storage.
Pro Tips For Making Asian Raisin Bread
- Bloom the Yeast Right: Skip the instant yeast shortcut and proof your active dry yeast in warm milk with a pinch of sugar first—it should foam in 5-10 minutes. I learned this the hard way after baking a dense loaf because my yeast was still asleep when I mixed everything.
- Soften Butter Properly: Use the "finger press" test—when the butter leaves a slight indent but holds its shape, it’s ready. Over-softened butter makes the dough greasy, and under-softened butter won’t mix well. My grandmother swore by this, and she was right: the texture actually changes the outcome.
- Don’t Overwork the Dough: Stop kneading as soon as the dough springs back when poked—usually 8-10 minutes by hand. Over-kneading develops too much gluten, and that’s how you end up with a chewy, dense loaf instead of a tender, fluffy one. (Yes, even if you’re impatient like me.)
- Use Room-Temp Milk: Cold milk slows fermentation, and hot milk kills the yeast—both lead to a flat, sad loaf. Warm it to about 110°F (like a warm bath) before mixing. I was skeptical until I tried it: the rise is faster, and the flavor’s richer. (Your future self will thank you.)
Essential equipment for asian raisin bread
Dough Hook Attachment
A stand mixer with a dough hook attachment is a game-changer for this recipe. I use my KitchenAid Artisan Series mixer because it handles the dense, buttery dough effortlessly without overworking it. The hook kneads the dough evenly, ensuring a smooth, elastic texture without burning the butter.
If you don’t have a stand mixer, a wooden spoon or dough whisk works in a pinch, but be prepared for some arm work—knead for 8-10 minutes by hand until the dough pulls away from the bowl. 💪
Loaf Pan Essentials
Use a 9x5-inch loaf pan for the classic shape, but lightly grease it with vegetable oil or line it with parchment paper for easy removal. I prefer Wilton Non-Stick Loaf Pans because they release the bread cleanly without sticking.
For extra crispiness, spray the pan with cooking spray before adding the dough. Avoid dark-colored pans—they can cause uneven browning. If you’re feeling adventurous, try a pullman pan for a taller loaf with a rustic look.
Instant-Read Thermometer
An instant-read thermometer is non-negotiable for perfect doneness. I swear by the Thermoworks Thermapen ONE—it’s fast and accurate. Insert it into the center of the loaf when it’s done baking; the internal temperature should reach 190°F.
Without one, you risk underbaking (gummy texture) or overbaking (dry crust). Pro tip: Check the temperature 5 minutes before the recipe’s suggested bake time to avoid overcooking. 🌡️
Proofing Tools
A proofing box or warm oven is ideal for consistent rises. If you don’t have one, create a DIY version by filling a large bowl with hot water and placing your dough bowl on top.
Alternatively, turn your oven to 100°F (or its lowest setting) and let the dough rise inside. I also keep a damp kitchen towel handy to cover the dough—this prevents a dry skin from forming.
For extra insurance, place the dough bowl in a plastic bag sealed loosely to trap warmth and humidity.
Offset Spatula
An offset spatula is perfect for spreading the cinnamon-sugar mixture evenly over the raisins. I use a OXO Good Grips one—its flexible head helps smooth out the filling without tearing the dough. For the swirl step, a sharp chef’s knife is best to cut the log cleanly.
If you’re making multiple loaves, a pastry brush comes in handy for lightly brushing the dough with milk before the final rise to create a glossy, golden crust. 🍞
Wire Rack Must-Have
Never skip the wire cooling rack—it’s crucial for even cooling and crisp crust development. I keep a stainless steel rack from Amazon Basics near my oven for quick transfers. Place the rack over a baking sheet to catch any crumbs.
Cooling the bread on a counter or in the pan traps steam, leading to a soggy texture. For extra crunch, let the bread cool completely before slicing—this ensures clean cuts through those buttery layers. 🔥
Nutrition facts
Frequently asked questions
Can I substitute raisins with other dried fruits?
Try dried cranberries (reduce soaking time to 15 minutes) or chopped dates for a chewier texture. For a tropical twist, use dried pineapple or mango—just adjust the soaking liquid to orange juice instead of water to keep them moist.
Why did my bread turn out dense instead of light?
Dense bread usually means the yeast didn't activate properly or the dough didn't rise enough. Double-check your yeast by testing it in warm water with sugar—it should foam in 5-10 minutes. Also ensure your kitchen is warm enough (or use a proofing box) and let the dough rise until it doubles in size. Over-kneading can also make bread tough, so knead just until smooth.
How do I make this bread without a stand mixer?
No problem! Use a wooden spoon or dough whisk to mix ingredients, then knead by hand on a floured surface for 8-10 minutes until the dough is smooth and elastic. Work in a well-floured bowl to prevent sticking, and use your knuckles to test elasticity—press gently and it should spring back slowly. The dough should feel slightly tacky but not sticky.
Can I add nuts or chocolate chips to this recipe?
Yes! Fold in ½ cup chopped walnuts or pecans with the raisins, or add ½ cup mini chocolate chips for a decadent twist. For nuts, toast them first for extra flavor. Just reduce the raisins by ¼ cup to maintain the right balance. The chocolate chips will melt slightly during baking, creating pockets of gooey goodness.
How long does this bread keep, and can I freeze it?
Store wrapped at room temperature for 3 days or in the fridge for 1 week. For freezing, wrap individual slices in plastic and place them in a freezer bag—they'll stay fresh for 3 months. To reheat, toast frozen slices directly in the toaster for a crispy crust. For whole loaves, freeze before slicing and thaw overnight in the fridge.