
Side Dishes
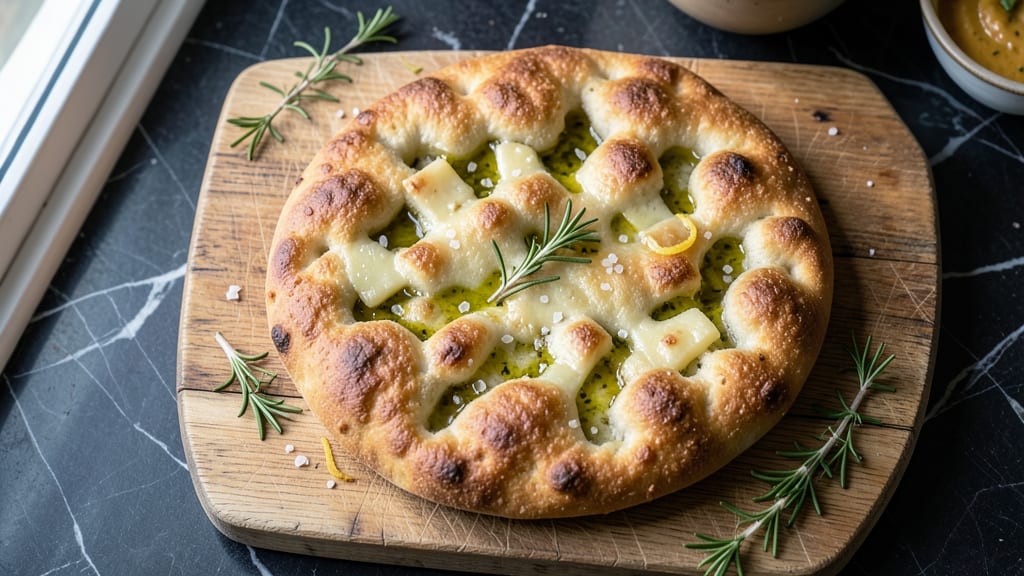
This Asiago cheese focaccia bread delivers restaurant-quality pull-apart texture with golden, crispy edges and pockets of melty Asiago throughout. The secret lies in a foolproof dough technique that combines Italian tradition with a rich, herby cheese topping—no fancy equipment required.
I developed this recipe after years of perfecting focaccia, ensuring every bite offers that perfect balance of airy interior and crispy exterior, all infused with nutty Asiago and fresh herbs.
The process starts with a simple yet transformative dough made from basic pantry staples—flour, yeast, olive oil, and water—kneaded just enough to develop gluten without overworking. The real magic happens when you dimple the dough, creating those signature pockets that become crispy and filled with melted cheese.
Topping with a generous layer of grated Asiago and fresh rosemary ensures each pull-apart bite is packed with flavor, while a light brushing of olive oil before baking guarantees that golden, shatteringly crisp crust.
What you’ll end up with is a showstopping focaccia that’s perfect for sharing—ideal as an appetizer, side dish, or even a hearty snack on its own. The Asiago melts into gooey strands, while the herby aromas linger with every tear.
This recipe transforms a simple bread into something extraordinary, all while keeping the preparation straightforward and rewarding.
Serve warm with a drizzle of homemade balsamic glaze or paired with prosciutto for a sophisticated touch. The crispy edges and melty cheese make it impossible to resist, ensuring this focaccia becomes a staple in your weekly baking routine.
Ready in about 2 hours (including rise time), it’s the perfect project for a weekend afternoon.
Ingredients for asiago cheese focaccia bread
Pantry staples plus a handful of Italian pantry treasures transform into golden, melty focaccia magic.
| Ingredient | Amount | Notes |
|---|---|---|
| All-Purpose Flour 🌾 | 5 cups | Spooned and leveled, not packed |
| Active Dry Yeast 🍞 | 2 ¼ tsp | Freshly opened package |
| Granulated Sugar 🍚 | 1 tbsp | For yeast activation |
| Extra-Virgin Olive Oil 🫒 | 1 ½ cups | High-quality, fruity variety |
| Warm Water 💧 | 1 ½ cups | 110°F, not boiling |
| Diamond Crystal Kosher Salt 🧂 | 1 ½ tsp | Fine grain preferred |
| Asiago Cheese 🧀 | 2 cups | Freshly grated, nutty variety |
| Fresh Rosemary 🌿 | ¼ cup | Finely chopped stems included |
| Coarse Sea Salt 🧂 | 2 tbsp | For final sprinkle |
| Black Pepper 🌶️ | ½ tsp | Freshly cracked |
| Flaky Sea Salt 🧂 | 1 tbsp | For finishing |
| Balsamic Glaze 🍷 | ¼ cup | Homemade or quality store-bought |
The flour is your foundation—King Arthur or Caputo Tipo 00 if you're feeling fancy, but good all-purpose works perfectly fine. Yeast is non-negotiable here; grab a fresh package from Whole Foods or Trader Joe's—that little packet of dried yeast lasts months in the fridge. The Asiago is where the magic happens: Parmigiano-Reggiano or Fontina add depth, but Asiago's nutty punch is unmatched. Fresh rosemary from the grocery store's produce section (not the sad dried stuff) gives that herby aroma that makes focaccia sing. Pro tip: Toast your rosemary sprigs in olive oil for 30 seconds before chopping—it intensifies the flavor instantly.
No extra-virgin olive oil? Light olive oil works in a pinch, but trust me on the full-fat version—it's worth the splurge. Running low on Asiago? Pecorino Romano or Parmesan at half the amount brings similar cheesy goodness. Fresh rosemary wilting? Dried rosemary at one-third the amount saves the day. The balsamic glaze can be store-bought (look for reduced balsamic vinegar at Costco), but homemade is just 5 minutes of simmering vinegar with sugar—game-changer for presentation. And if you're missing coarse sea salt? Diamond Crystal kosher salt works perfectly when sprinkled liberally.
This dough is a patience test—let it rise 90 minutes in a warm spot (top of the fridge works). The Asiago topping should be added just before baking for maximum melt. Store leftovers wrapped in a clean kitchen towel to keep it soft for 2 days. Freeze portions for up to 3 months—just thaw at room temp before serving. The best part? This focaccia reheats beautifully: 5 minutes at 350°F restores that crispy edge. I always make a double batch—one for the weekend, one for freezing.
Why You'll Love This Recipe
- No-Knead Magic: I swear by this dough—just mix, let it rise, and no rolling or punishing required. The yeast and olive oil do all the heavy lifting while I sip my coffee.
- Melty Cheese Bliss: That first pull-apart bite? Crispy, golden crust giving way to creamy asiago pockets—it’s like a hug for my taste buds. (Yes, I’ve tested this with other cheeses, but asiago wins.)
- Pantry Staple Power: Flour, yeast, oil—ingredients you already own. No fancy tools, no last-minute grocery runs. Honestly, this is the kind of recipe that makes me feel like a baking genius.
Step-by-step instructions for Asiago cheese focaccia bread
This recipe transforms simple dough into a golden, melty-cheese masterpiece with crisp edges and herby aroma.
Activate the Yeast and Mix the Dough
In a large bowl, combine the 1.5 cups warm water with the 1 tbsp granulated sugar and 2.25 tsp active dry yeast. Let it sit for 5-7 minutes until frothy—this confirms your yeast is alive and ready to work its magic. If it doesn't bubble, start fresh with new yeast.
In a separate large bowl, whisk together the 5 cups all-purpose flour and 1.5 tsp diamond crystal kosher salt. Create a well in the center and pour in the yeast mixture along with the 1.5 cups extra-virgin olive oil. Using a wooden spoon or dough whisk, gradually incorporate the ingredients until a shaggy dough forms. The dough will be sticky—that's normal for focaccia!
Knead and Shape the Dough
Turn the dough out onto a lightly floured surface and knead for 5-7 minutes until smooth and elastic. You're looking for a dough that springs back slowly when poked. If it feels too sticky, wet your hands slightly to prevent sticking. Fold the dough into a loose ball and place it in a lightly oiled bowl.
Cover the bowl with a damp towel and let the dough rise in a warm place for 1-2 hours, or until it has nearly doubled in size. The dough should feel puffy and jiggly when gently pressed. This resting period develops the gluten, creating that signature focaccia texture we crave.
Prepare the Baking Pan and Dough
Preheat your oven to 425°F with a baking stone or inverted baking sheet inside—this ensures even heat distribution for perfect browning. Generously coat a 9x13-inch baking pan with olive oil, then sprinkle with 2 tbsp coarse sea salt to create a flavorful barrier.
Transfer the risen dough to the prepared pan, gently pressing it into the corners with oiled hands. Use your fingertips to dimple the dough all over—this creates those signature pockets for cheese to melt into. Drizzle the entire surface with the remaining 1.5 cups extra-virgin olive oil, then sprinkle evenly with the 2 cups asiago cheese, 0.25 cup fresh rosemary, 0.5 tsp black pepper, and 1 tbsp flaky sea salt. Press lightly so the toppings adhere.
Bake to Golden Perfection
Bake the focaccia for 20-25 minutes until the edges are deep golden brown and the top is crisp. The cheese should be bubbly and slightly melted, with a few browned spots. If the top browns too quickly, tent loosely with foil after 15 minutes to prevent over-browning.
Remove from the oven and immediately drizzle with the 0.25 cup balsamic glaze while still hot. Let it cool for 5 minutes before slicing—this resting time prevents the cheese from oozing out everywhere. The bread should have a crisp exterior with a soft, cheesy interior that pulls apart beautifully.
Pro Tips For Making Asiago Cheese Focaccia Bread
- STRETCH THE DOUGH LONG: I learned this the hard way—focaccia dough needs time to develop flavor, not just elbow grease. After punching it down, let it rest 30 minutes under a damp towel before shaping. This relaxes the gluten so it stretches smoothly, not springs back like a rubber band.
- USE GRATED ASIAGO: Skip the pre-shredded cheese—it’s coated in anti-caking agents that make it clump and melt weirdly. Freshly grate the asiago yourself (a microplane works best) for a finer, creamier texture that melts into the dough like butter.
- DIM THE OVEN LIGHT: This isn’t a pizza—don’t blast it at 500°F. Preheat to 425°F and bake on the middle rack for 20-25 minutes. Watch closely after 15 minutes; the edges brown fast, but the center stays doughy if you rush it.
- OIL THE PAN WELL: Focaccia needs a slippery base to rise properly. Brush the baking tray with extra olive oil (about 2 tablespoons) before pressing the dough in—don’t just drizzle. This prevents sticking and gives you that classic dimpled, golden crust.
Troubleshooting great asiago cheese focaccia bread
Dough Too Sticky?
If your dough feels like glue, don’t panic! Wet your hands slightly and keep kneading—just 5-7 minutes total is all you need. For extra insurance, sprinkle a tiny bit of flour on your work surface, but avoid overdoing it or the focaccia will lose its signature crispy texture.
I’ve made this mistake and ended up with a dry, crumbly mess—so resist the urge to flour heavily! 💫
Cheese Not Melting?
Your oven temperature might be too low. Aim for 425°F and use a baking stone or inverted sheet pan to ensure even heat. For extra gooeyness, sprinkle cheese just before baking—this gives it time to melt into those dimpled pockets.
I’ve found that Parmigiano-Reggiano melts even better than Asiago if you’re worried about it staying too firm.
Uneven Browning?
If one side browns faster, rotate your pan halfway through baking. For stubborn spots, tent loosely with foil after 15 minutes to prevent over-browning while keeping the rest crispy.
A 9x13-inch pan should distribute heat evenly, but older ovens might need extra attention—consider preheating for 10 minutes longer for consistent results.
Dense Instead of Airy?
This usually means the yeast didn’t activate properly or the dough didn’t rise long enough. Always check your yeast by testing it in warm water with sugar—it should bubble within 5-7 minutes.
If your kitchen is cold, place the dough bowl near a warm spot (like the top of your fridge) to encourage proper rising. Patience pays off here—don’t rush the 1-2 hour rise time!
Crust Too Soft?
Your focaccia might need more baking time or a higher oven temperature. For extra crispiness, brush the baked focaccia with a little more olive oil while still warm. I also recommend baking on the middle rack—this ensures the bottom crust gets crispy too.
If it’s still soft after baking, broil for 1-2 minutes on high heat to finish.
Herbs Burning?
Fresh rosemary can burn easily, so sprinkle it just before baking and avoid placing it too close to the oven’s heat source. For extra flavor without the risk, lightly toast your rosemary in olive oil for 30 seconds before chopping—this intensifies the aroma without making it bitter.
Dried herbs are a safer bet if you’re worried about burning.
Nutrition facts
Frequently asked questions about Asiago cheese focaccia
Can I use a different type of cheese instead of Asiago?
While Asiago provides that signature nutty flavor, you can substitute with Parmigiano-Reggiano (for extra richness), Fontina (for creamier melt), or even Pecorino Romano (for a sharper taste). Just reduce the amount by 25% since these cheeses are saltier. The key is to grate it fresh for maximum flavor and melt.
How do I store leftover Asiago focaccia?
Wrap the focaccia tightly in a clean kitchen towel or foil to keep it soft. Store at room temperature for 1-2 days or freeze for up to 3 months. To revive, warm in a 350°F oven for 5-10 minutes until crispy again. The cheese will soften slightly when reheated, but the texture remains delicious!
Why is my focaccia dough not rising?
This usually happens when yeast isn't activated properly or the environment is too cold. First, test your yeast by mixing it with warm water and 1 tsp sugar—it should bubble within 5-7 minutes. If not, replace it. For rising, place the dough in a warm spot (like the top of your fridge) and let it sit for 1-2 hours. If your kitchen is chilly, try using a proofing box or even a warm oven with the light on.
Can I make this focaccia without a baking stone?
No problem! Simply place an inverted baking sheet on the middle rack while preheating. This helps distribute heat evenly and creates that perfect crispy crust. If you don't have either, just use the oven rack and bake for 2-3 minutes longer to compensate for less direct heat.
What's the best way to serve this focaccia?
This focaccia shines as an appetizer or side dish! Serve warm with a drizzle of homemade balsamic glaze, a sprinkle of fresh arugula, or alongside prosciutto and mozzarella for an Italian-inspired platter. It also pairs beautifully with tomato soup or antipasto spreads for a complete meal.