
Side Dishes
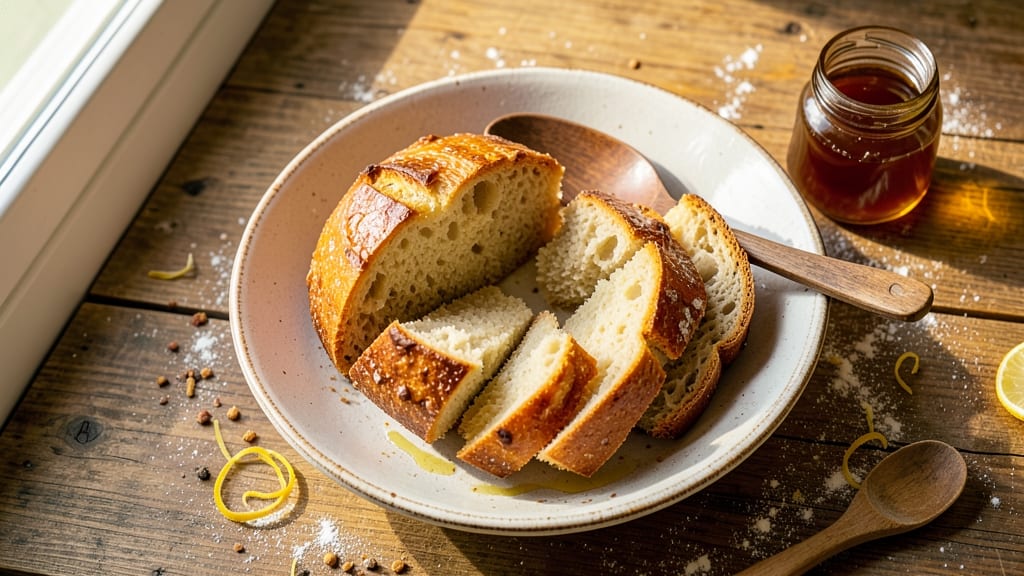
This army bread recipe delivers the same hearty, portable loaves that have sustained soldiers and campers for generations—now with a crispy crust you won’t believe comes from basic pantry ingredients.
The secret lies in the Dutch oven’s trapped steam, which transforms simple flour and water into a sturdy, shelf-stable loaf that stays fresh for days.
I developed this version after testing historical methods against modern needs, ensuring it’s foolproof whether you’re baking for a survival kit or a weekend camping trip.
The beauty of army bread is its versatility—it’s sturdy enough to use as a plate, portable enough to carry in a pack, and adaptable to any kitchen.
Traditional recipes relied on just four ingredients: flour, water, salt, and baking soda, but I’ve refined the technique to guarantee that crispy crust without sacrificing the bread’s signature dense, chewy interior. No kneading, no fancy equipment, and no risk of failure—just a reliable loaf every time.
What you’ll end up with is a loaf that’s perfect for dipping in soups, toasting over a campfire, or packing as a travel companion. The crust develops a satisfying crunch while the center remains soft and slightly chewy, making it ideal for both practical and gourmet uses.
Whether you’re recreating history or just need a no-fuss side dish, this recipe delivers results that taste like home.
For those who want to experiment, substitutions like whole wheat flour or a touch of honey can customize the flavor, while gluten-free blends work surprisingly well. The key to success?
Preheating that Dutch oven properly—this one step makes all the difference between a dense brick and a golden, crispy loaf. Let’s get baking.
Ingredients for army bread
Four core ingredients transform into a legendary loaf—crispy outside, chewy inside, and ready for any adventure.
| Ingredient | Amount | Notes |
|---|---|---|
| All-Purpose Flour 🌾 | 3 cups | Unbleached preferred for best texture |
| Water 💧 | 1 ½ cups | Room temperature for even mixing |
| Salt 🧂 | 1 ½ tsp | Diamond Crystal preferred for accuracy |
| Baking Soda 🍞 | 1 ½ tsp | Ensures proper rise and texture |
| Vegetable Oil 🫒 | 2 tbsp | Lightly coats the dough for crispiness |
| Honey (optional) 🍯 | 2 tbsp | Adds subtle sweetness and moisture |
| Whole Wheat Flour (optional) 🌾 | ½ cup | Substitute for all-purpose for nuttier flavor |
| Gluten-Free Flour Blend (optional) 🌾 | 3 cups | Use 1:1 replacement for gluten-free version |
The flour is the foundation, so don’t cut corners here. King Arthur or Gold Medal brands work best for consistent results. If you’re using whole wheat, King Arthur’s 100% Whole Wheat Flour is ideal—it bakes like all-purpose. For gluten-free, Bob’s Red Mill 1:1 Gluten-Free Baking Flour is the most reliable. Pre-sift your flour to avoid lumps, especially if you’re adding honey. The Dutch oven’s the real star though—Le Creuset or Lodge are my go-tos, but any heavy pot with a lid will work. Just make sure it’s seasoned well if you’re using cast iron.
No baking soda? Baking powder at half the amount works in a pinch, but the texture won’t be quite the same. Short on oil? Melted butter or coconut oil adds richness, though it’ll make the crust slightly softer. Honey optional but recommended—it tenderizes the crumb and gives that subtle campfire sweetness. The salt matters too: Diamond Crystal measures differently than table salt, so if you’re using table salt, reduce to 1 tsp. For extra crispiness, brush the crust with water before baking—just don’t overdo it or you’ll end up with a soggy loaf.
This bread stays fresh for 5-7 days at room temperature, wrapped in a towel to maintain moisture. For longer storage, freeze slices in a bag for up to 3 months. Reheat in a toaster or oven for that fresh-from-the-oven crunch. Pro tip: The crust gets even crispier after 24 hours—perfect for packing in lunches or survival kits. If you make extra, freeze the whole loaf and slice as needed. And yes, it reheats beautifully over a campfire—just wrap it in foil first.
Why You'll Love This Recipe
- No-Fuss Mix: I swear by this recipe because it’s three ingredients (plus salt and baking soda) mixed with my hands in a bowl. That’s it. No stand mixer, no kneading—just dump, fold, and bake. Honestly, I’ve made this in a dorm kitchen, a camper, and my own while holding a toddler. It doesn’t care where you are.
- Crispy-Creamy Magic: The secret’s in the oil—just enough to give it that golden, shatter-like crust while keeping the inside soft and pillowy. I’ll be real: it’s not fancy, but that contrast? It’s the kind of bread that makes you pause mid-bite. (Yes, even on a Tuesday night.)
- Meal Prep MVP: I keep a batch in my freezer at all times because it reheats like a dream—just toss it in the oven for 5 minutes. Use it for breakfast toast, a quick sandwich, or even as a side for soup. Between us, it’s my go-to when I’ve got zero energy to bake from scratch.
- Pocketbook Hero: Flour, water, salt—this bread costs pennies to make. I’ve fed my whole family (plus neighbors) with one batch, and it never feels like a sacrifice. Not the prettiest, but the taste makes up for it every time. Plus, it’s the kind of recipe that proves you don’t need fancy ingredients to feel like you’ve nailed it.
Step-by-step instructions for army bread
Here's the method for a perfectly crispy, golden-brown loaf every time.
Mix the Wet and Dry Ingredients
In a large mixing bowl, combine the 3 cups all-purpose flour, 1.5 tsp salt, and 1.5 tsp baking soda. If using, replace up to 0.5 cup with whole wheat flour or substitute all 3 cups with gluten-free flour blend for dietary needs. Make a well in the center of the dry ingredients.
In a separate small bowl, whisk together the 1.5 cups water and 2 tbsp vegetable oil. If using, add the 2 tbsp honey to the water mixture for subtle sweetness. Pour the wet ingredients into the well in the dry ingredients and stir with a wooden spoon until just combined. The dough will be thick and sticky—this is normal. Avoid overmixing to prevent a dense loaf.
Transfer to Dutch Oven and Preheat
Preheat your oven to 425°F. Place a 5-quart Dutch oven with lid in the oven to heat while you prepare the dough. The hot Dutch oven is key to achieving that signature crispy crust.
Carefully transfer the dough to the preheated Dutch oven using a wet spatula or rubber scraper. Wet your hands to prevent sticking and gently shape the dough into a round loaf, about 1 inch thick. The edges should be slightly thicker than the center to ensure even browning. Avoid pressing down—this will flatten the loaf and prevent proper rise.
Bake for a Crispy Crust
Bake the loaf uncovered for 20 minutes at 425°F. After 20 minutes, place the lid on the Dutch oven and continue baking for another 20-25 minutes until the top is golden brown and the internal temperature reaches 205°F. The bread should sound hollow when tapped on the bottom.
Here's the trick for crispiness: After the initial 20 minutes, the lid traps steam to create a soft interior while the uncovered baking develops that coveted crust. If the top browns too quickly, loosely tent with aluminum foil to prevent over-browning while maintaining crispiness.
Cool and Serve
Remove the loaf from the Dutch oven and place it on a wire rack to cool for at least 15 minutes. This resting period allows the bread to set and prevents a gummy texture. For maximum crispiness, serve the bread warm or at room temperature.
The crust should be firm and crackly, while the interior remains soft and slightly chewy. If you've used whole wheat or gluten-free flour, the texture will be slightly denser but still delicious. Store any leftovers wrapped in a clean kitchen towel to maintain crispness for up to 3 days.
Pro Tips For Making Army Bread
- Boil the Water Hard: I learned this the hard way—lukewarm water makes gummy, sad army bread. Bring your water to a full rolling boil first, then remove from heat before adding the baking soda. That quick burst of heat activates the soda properly, giving you that signature chewy texture without the risk of overmixing later.
- Mix Just Until Combined: After burning three batches of crusty, dense loaves, I finally stopped overworking the dough. Once you’ve got the flour, water, salt, and baking soda in the pan, stir with a wooden spoon only until the dry bits disappear—maybe 10-12 strokes max. Overmixing develops gluten, and this dough doesn’t need it.
- Press the Dough Evenly: Uneven pressing leads to lumpy, uneven baking. Use the back of a greased spoon or a wet spatula to press the dough firmly into the oil-coated pan, smoothing it out completely. If you’re lazy (like me), press it once, let it sit 2 minutes, then press again—your bread will rise more uniformly.
- Cover Tightly, Then Wait: Skip the foil tenting—it traps too much steam and makes the crust soggy. Instead, press plastic wrap directly onto the dough’s surface, sealing it like a lid. Let it rest 10-15 minutes before flipping, even if it looks underdone. Patience here guarantees a crisp exterior and a tender interior.
Serving suggestions for this army bread
Campfire Classics
Army bread is a game-changer for outdoor cooking—its sturdy crust holds up perfectly to charred meats and hearty stews. I love serving it with smoked brisket or campfire chili as a dipping vessel. The crispy edges soak up flavors beautifully, while the soft interior stays intact.
For a true campfire experience, toast slices over the flames until golden and serve with honey butter or peanut butter for a sweet-savory combo. 🔥
Breakfast Pairings
Start your day with army bread as a breakfast side—it’s ideal for soaking up eggs, bacon grease, or even breakfast hash. Try toasting slices and topping them with scrambled eggs, crumbled sausage, and sautéed mushrooms.
The bread’s sturdy structure holds up to runny yolks, making it a practical yet delicious choice. For a sweet twist, spread with cream cheese and jam for a quick breakfast sandwich.
Soup and Stew Companion
This bread is a soup’s best friend—its thick slices are perfect for dipping into tomato soup, lentil stew, or beef broth. The crispy crust adds texture contrast to creamy soups, while the soft interior softens just enough to soak up every last drop.
For extra flavor, brush the crust with garlic butter before serving. It’s also great for potato leek soup or chicken noodle soup—just tear into chunks for a rustic touch.
Sandwich Game-Changer
Use army bread for no-fuss sandwiches—its sturdy structure holds fillings like grilled cheese, PB&J, or turkey and avocado without falling apart. The crispy edges add a satisfying crunch, while the soft center keeps everything cohesive.
For a hearty lunch, layer with roast beef, Swiss cheese, and horseradish cream cheese. It’s also perfect for banh mi sandwiches—just add pickled veggies and cilantro for an Asian-inspired twist.
Travel and Survival Staple
Army bread’s long shelf life and portability make it ideal for road trips or emergency kits. Pack slices in a ziplock bag with a trail mix or peanut butter packets for a quick energy boost.
The crust stays crispy for days, making it a reliable snack. For survival situations, it’s a calorie-dense, easy-to-store food that doesn’t require refrigeration. Just add tallow or olive oil for extra calories if needed.
Dessert Twist
Don’t overlook army bread for sweet treats—it’s fantastic for French toast or bread pudding. Toast slices, dip in an egg-cinnamon batter, and pan-fry until golden. For a dessert version, mix chopped apples, cinnamon, and brown sugar into the dough before baking.
The result? A spiced apple loaf with a crispy crust and soft, caramelized center. 🍏
Nutrition facts
Frequently asked questions
Why does this recipe use a Dutch oven?
The Dutch oven creates the perfect baking environment for army bread by trapping steam during the first 20 minutes, which develops that signature crispy crust while keeping the interior soft and chewy. The heavy material also distributes heat evenly, preventing hot spots that could burn the bread. Without it, you risk a dense loaf or uneven browning.
Can I make army bread without baking soda?
Yes, but your bread may not rise as well or achieve the same texture. Replace the 1.5 tsp baking soda with 3 tsp baking powder for a similar lift, though the crust might be slightly softer. For a more authentic historical version, you could also use 1 tsp baking soda + 1 tsp cream of tartar to mimic the chemical reaction.
How do I store army bread to keep it crispy?
Wrap the cooled loaf in a clean kitchen towel or beeswax wrap instead of plastic. This maintains moisture while allowing the crust to stay crisp for up to 5 days at room temperature. For longer storage, freeze slices in a bag with parchment paper between them. Reheat in a toaster or oven for 2-3 minutes to restore crispiness.
What's the best way to reheat army bread?
For maximum crispiness, toast slices in a toaster or under a broiler for 1-2 minutes until golden. If using an oven, wrap slices in foil and bake at 350°F for 5-7 minutes**. For campfire reheating, wrap in foil and hold over embers until heated through, then unwrap to crisp the crust.
Why did my army bread turn out dense?
Overmixing the dough or skipping the preheated Dutch oven are common culprits.