
Desserts
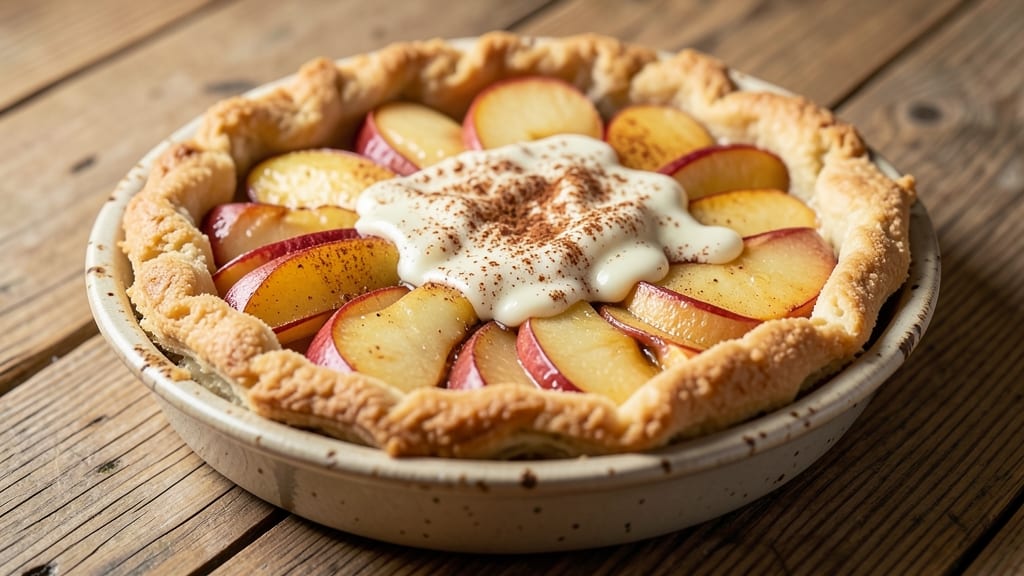
This apple shortbread recipe delivers the perfect balance of buttery shortbread crust and spiced apple filling that melts in your mouth. ✨ The secret lies in a crisp, golden base layered with tender apple swirls that caramelize just enough to create a rich, aromatic center—no soggy bottoms or overly sweet results.
I've perfected this technique over years of baking, ensuring every bite has that signature crunch and sweet-tart apple flavor.
The magic begins with a simple dough made from just five ingredients—flour, butter, sugar, and a pinch of salt—that creates the ideal flaky, melt-in-your-mouth texture. The filling combines apples with cinnamon, nutmeg, and a touch of lemon juice to enhance their natural sweetness while keeping the shortbread structure intact.
Baking at the right temperature ensures the edges stay crisp while the filling remains soft and gooey.
What you'll end up with is a dessert that looks elegant enough for a holiday table but is simple enough for a weeknight treat. The contrast between the crisp, buttery edges and the warm, spiced apple center makes each bite irresistible.
This recipe is foolproof, with clear instructions that ensure perfect results every time.
Serve it warm with a scoop of vanilla ice cream or dusted with powdered sugar for a classic presentation. The versatility of this recipe means you can adjust the apple filling to include raisins, nuts, or even a hint of bourbon for a more sophisticated twist. Let's get baking!
Ingredients for apple shortbread
Five core ingredients create the perfect buttery shortbread crust with spiced apple filling.
| Ingredient | Amount | Notes |
|---|---|---|
| All-Purpose Flour 🌾 | 2 ½ cups | Sifted for light texture |
| Unsalted Butter 🧈 | 1 cup | Cold, cubed for flaky layers |
| Granulated Sugar 🍚 | ½ cup | Superfine preferred for smoothness |
| Salt 🧂 | ½ tsp | Fine sea salt preferred |
| Apples 🍎 | 3 medium | Peeled, cored, thinly sliced |
| Ground Cinnamon 🌿 | 1 ½ tsp | Freshly ground for warmth |
| Ground Nutmeg 🌿 | ¼ tsp | Freshly grated preferred |
| Lemon Juice 🍋 | 1 tbsp | Freshly squeezed for brightness |
| Powdered Sugar 🍚 | 2 tbsp | For dusting finished shortbread |
| Vanilla Ice Cream 🍦 | 1 ½ cups | For serving (optional) |
The butter is non-negotiable here—European-style or Plugrá gives the most flavor. Grab it chilled from the dairy case at Whole Foods or your local market. The apples should be firm and crisp (like Granny Smith or Honeycrisp), not overly sweet. Thinly slice them—mandoline slicer is perfect for even cuts. For the flour, King Arthur or Gold Medal brands work best. The cinnamon and nutmeg? Penzeys spices are ideal, but any fresh-ground variety will do. If you can't find fresh nutmeg, a pinch of pumpkin pie spice works in a pinch.
No superfine sugar? Pulse regular granulated sugar in a food processor for 10 seconds to make it finer. Subbing apples? Pears or rhubarb work beautifully—just reduce lemon juice slightly. Want extra richness? Add 1 tbsp brown sugar to the filling. The dough should be crumbly but hold together when pressed—if it's too dry, add 1 tsp cold milk. For a gluten-free version, swap flour for a 1:1 gluten-free baking flour blend. The ice cream is optional, but trust me—vanilla bean makes this dessert feel extra special.
Store the dough in the fridge for up to 3 days wrapped tightly in plastic. The assembled shortbread keeps for 2 days at room temperature in an airtight container. For longer storage, freeze the unbaked shortbread rounds for 3 months. Reheat slices in a 350°F oven for 5-7 minutes to restore crispness. Leftovers? Wrap individually and freeze—perfect for quick desserts. The filling stays best when made fresh, but you can prep it a day ahead and store it in the fridge.
Why You'll Love This Recipe
- No-Fuss Butter Magic: I swear by that cold butter trick—just cube it, pulse it with flour until it looks like wet sand, and press. No mixer? No problem. The dough comes together faster than I can scroll through my phone, and the result is that perfect crumbly texture we all crave.
- Apple Cinnamon Hug: That first bite of warm shortbread with caramelized apple chunks? It’s like autumn in cookie form. The apples soften just enough to release sweetness, while the butter and sugar give it that melt-in-your-mouth richness. Honestly, I’ve never met a shortbread that didn’t disappear in minutes.
- Crowd-Pleaser Flex: Bring it to a picnic, a potluck, or even as a last-minute dessert for company. The dough holds its shape like a champ, and the apples add a fresh twist that feels fancy without the fuss. My in-laws think I baked it from scratch—our secret’s safe.
- Leftovers? More Like Left-Crumb: This recipe actually wants to be made in bulk. The shortbread stays fresh for days in an airtight container, and the apple bits keep it tasting vibrant. I’ve reheated slices in the oven for breakfast (yes, really) and still had people asking for seconds. Budget-friendly? Absolutely. Versatile? Even more so.
Step-by-step instructions for apple shortbread with melty apple swirls
Here's how to create buttery layers with crisp edges and warm apple swirls that cut through the richness.
👨🍳 Step 1: Prepare the Apple Filling and Prep the Dough
Start by peeling, coring, and thinly slicing the 3 medium apples into ⅛-inch thick rounds. Toss them with 1 tbsp lemon juice, 1.5 tsp ground cinnamon, and 0.25 tsp ground nutmeg in a bowl. Let this mixture sit for 10 minutes while you prepare the dough—this prevents browning and infuses the apples with flavor.
In a large bowl, whisk together the 2.5 cups all-purpose flour, 0.5 cup granulated sugar, and 0.5 tsp salt. Cut in the 1 cup cold, cubed unsalted butter using a pastry cutter or your fingers until the mixture resembles coarse crumbs with pea-sized butter pieces. This cold butter creates flaky layers when baked.
🍳 Step 2: Assemble and Chill the Shortbread
Press half of the dough mixture into a 9-inch pie dish, using your fingers to create an even layer. Spread the apple filling evenly over the dough, leaving a ½-inch border around the edges. Sprinkle with 1 tbsp powdered sugar to prevent sticking.
Top with the remaining dough and press gently to seal. Use a fork to crimp the edges decoratively. Wrap the pie dish tightly in plastic wrap and refrigerate for at least 1 hour—this chilling step is critical for preventing spreading and ensuring clean slices. I like to place it on a baking sheet to catch any potential drips during chilling.
🔥 Step 3: Bake to Golden Perfection
Preheat your oven to 350°F and place a rack in the lower third position. Remove the chilled shortbread from the refrigerator and bake for 45-50 minutes until the edges are deep golden brown and the center is just set. The top should look slightly puffed but not over-browned.
Here's the thing—if the edges brown too quickly, tent the shortbread with aluminum foil after 30 minutes to prevent over-browning while the center finishes baking. You'll know it's done when a toothpick inserted in the center comes out clean. Let it cool completely in the pan for 2 hours before slicing—this resting period allows the filling to set properly and prevents crumbly texture.
🍽️ Step 4: Serve with Vanilla Ice Cream
Once cooled, dust the top generously with the remaining 1 tbsp powdered sugar using a fine-mesh sieve. This creates that signature snowy finish that balances the warm apple flavors. Cut into 8 even wedges using a sharp knife—wipe the blade between cuts to ensure clean slices.
Serve each slice warm with a scoop of 1.5 cups vanilla ice cream on the side. The contrast between the crisp shortbread, melty apple filling, and cool ice cream creates the perfect balance of textures and temperatures. For an extra touch, garnish with a sprinkle of cinnamon or a few thin apple slices on top.
Pro Tips For Making Apple Shortbread
- CHILL THE DOUGH: I learned this the hard way—rolling out butter-fat dough straight from the fridge leads to greasy, messy shortbread. Wrap the dough in plastic and refrigerate for at least 30 minutes (or up to 24 hours for extra crispiness). Cold butter = cleaner cuts and better layers.
- GRATE APPLES FINE: Skip the food processor for apples—it turns shortbread into a dense, gummy mess. Use a box grater or mandoline for tiny, even pieces that melt into the dough without weighing it down. (Yes, even if it takes 5 minutes longer.)
- PRESS HARD ON BUTTER: I used to just mix butter into flour like biscuits, but shortbread demands more. Press the butter into the flour with your fingers until you see no dry bits—this creates the signature crumbly texture. (Your future self will thank you when the cookies don’t fall apart.)
- BAKE LOW AND SLOW: Shortbread needs patience—300°F (150°C) for 15–20 minutes, not the 350°F (175°C) you’d use for cookies. Overheating = burnt edges before the center sets. Rotate the pan halfway and check at 15 minutes; it’s done when the edges are just golden, not brown.
Make-ahead tips for leftovers
Dough Prep Ahead
Make the shortbread dough up to 3 days in advance and store it in an airtight container in the fridge. The cold butter will firm up again when you take it out, ensuring those perfect flaky layers.
I like to press it into a 9-inch pie dish and freeze it for 1 month—just thaw overnight in the fridge before adding the filling. 🧈
Filling Prep
Prep the apple filling the night before and store it in the fridge. The apples will soften slightly and absorb the spices better, giving you deeper flavor when you bake.
Keep it in a sealed container to prevent browning. For extra convenience, toss the sliced apples with 1 tsp cornstarch to help thicken the filling during baking. 🍎
Assembled Shortbread
Assemble the shortbread (dough + filling) and refrigerate it for up to 24 hours before baking. This extra chilling time helps the layers set more firmly, making it easier to slice cleanly.
I often prep mine the night before so it’s ready to bake in the morning—just pop it in the oven while you’re making coffee. ⏰
Freezer-Friendly
For a true time-saver, assemble the unbaked shortbread and freeze it for up to 3 months. Thaw it overnight in the fridge, then bake as directed. The texture stays just as crisp and buttery, and the filling remains perfectly gooey.
This is my go-to method when I know I’ll have company but don’t want to spend all day baking. ❄️
Reheating Leftovers
Store baked shortbread in an airtight container at room temperature for 2 days. To restore crispness, warm slices in a 350°F oven for 5-7 minutes—just until the edges are golden again.
For a quick fix, pop them in the microwave for 10-15 seconds (covered with a damp paper towel) to soften the filling without drying out the crust. 🔥
Portioning for Parties
Cut the cooled shortbread into 8 wedges and wrap each individually in parchment paper. Store them in a freezer bag for up to 2 months. When ready to serve, thaw at room temperature for 30 minutes—no reheating needed if you’re serving at room temp.
This makes it easy to pull out individual slices for guests without stress. 💫
Nutrition facts
Frequently asked questions about apple shortbread
Can I substitute apples in this recipe?
For a similar texture, try pears or rhubarb—just reduce the lemon juice to ½ tbsp since pears are less acidic. For something sweeter, plums or berries work too, but they'll need 1 tsp cornstarch to prevent a runny filling. The key is using firm, not overly ripe fruit.
Why does my shortbread turn out crumbly?
Crumbly shortbread usually means the butter melted too soon. Always use cold butter and don't overmix the dough—just combine until it forms clumps. If your kitchen is warm, chill the dough for 30 extra minutes before baking. Also, make sure your apples aren't too wet after tossing with spices.
Should I bake this in a different dish?
This recipe is designed for a 9-inch pie dish to create the perfect proportions, but you can use a 9-inch tart pan with a removable bottom for easier slicing. For individual servings, press the dough into 4-ounce ramekins and bake for 20-25 minutes—just add filling and top with extra dough crumbs.
How do I make this gluten-free?
Replace the all-purpose flour with a 1:1 gluten-free baking flour blend like Bob's Red Mill or King Arthur. For best results, add ½ tsp xanthan gum to help bind the dough. The texture will be slightly denser but still delicious. You may also need to reduce baking time by 5 minutes since gluten-free dough browns faster.
Can I make this without a pie dish?
Yes! Press the dough into a 9x13-inch baking pan for a bar-style shortbread. After adding filling, top with extra dough crumbs instead of a full layer. Bake for 35-40 minutes until golden. Cut into squares after cooling—this makes a great make-ahead dessert that's easy to serve at parties!