
Side Dishes
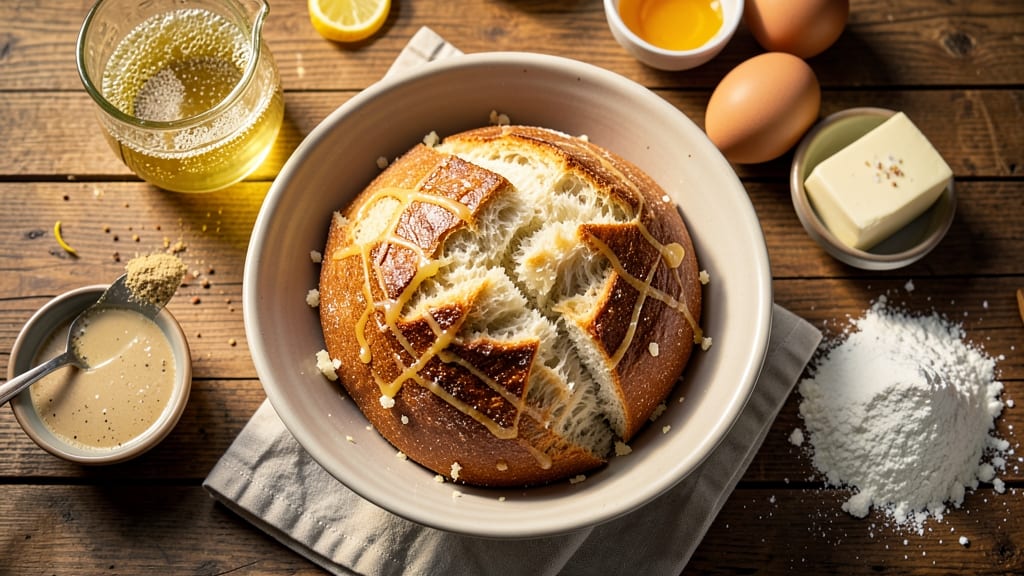
This American white bread recipe delivers the classic soft, pillowy texture you crave—without waiting a full day for rising. The secret lies in a precise blend of flour, yeast, and sugar that creates that signature tender crumb and golden crust.
I’ve perfected this method over years of baking, ensuring every slice is light, airy, and just slightly sweet.
The process is straightforward but requires attention to detail: kneading the dough until smooth, letting it rise twice for maximum fluffiness, and baking at the right temperature for an even golden-brown finish. No fancy equipment is needed—just a mixing bowl, a warm spot for rising, and a little patience.
The result? Bread so tender it practically melts in your mouth, perfect for sandwiches, toast, or serving with soups.
What sets this recipe apart is the no-day-rising approach—using a touch of sugar to activate the yeast quickly while maintaining that classic American white bread flavor. The dough develops naturally during the two shorter rises, giving you perfectly textured bread in just a few hours.
Once baked, it stays fresh for days, making it ideal for meal prep or sharing.
Serve warm with butter, jam, or as the base for your favorite sandwich. The versatility of this bread makes it a staple for any kitchen, and the foolproof method ensures success even for beginners. Let’s get started on creating your homemade loaf!
Ingredients for american white bread
Nine simple ingredients transform into pillowy, golden bread with no long waits.
| Ingredient | Amount | Notes |
|---|---|---|
| All-Purpose Flour 🌾 | 4 cups | Sifted for even texture |
| Active Dry Yeast 🍞 | 2 ¼ tsp | One packet for convenience |
| Granulated Sugar 🍚 | 1 tbsp | Enhances yeast activation |
| Unsalted Butter 🧈 | ½ cup | Softened, not melted |
| Large Eggs 🥚 | 1 whole | Room temperature preferred |
| Warm Water 💧 | 1 ¼ cups | 110°F for ideal yeast activation |
| Salt 🧂 | 1 ½ tsp | Kosher or sea salt |
| Milk 🥛 | ¼ cup | Warmed for tender crumb |
| Vegetable Oil 🫒 | 1 tbsp | For greasing bowl |
The flour is the backbone—King Arthur or Bob's Red Mill work best for that signature tender crumb. Grab the active dry yeast from the baking aisle, not instant yeast. I always check the expiration date—yeast loses power fast. The butter should be soft but not melted (think squishy, not liquid). For the milk, warm it just until you can't stand to hold your finger in it—too hot kills the yeast. Whole milk gives the best flavor, but any kind works in a pinch.
No active dry yeast? Instant yeast at 75% the amount (so 1.75 tsp instead of 2.25 tsp) works too. Short on butter? Vegetable shortening or coconut oil keeps the bread tender. The sugar can be swapped for honey or maple syrup (reduce other liquids by 1 tbsp). For a lighter texture, add 1 tsp baking powder—it's my secret weapon. The dough should be tacky but not sticky; if it's too dry, add 1 tsp more milk. If too sticky, sprinkle in 1 tbsp more flour.
Store the baked bread in a paper bag at room temperature for up to 3 days—keeps it soft. For longer storage, slice and freeze portions on a tray first, then bag. The dough can be refrigerated for up to 24 hours before shaping and baking. I always make two loaves—one for the freezer and one to enjoy fresh. Toasting revives stale bread perfectly, but fresh is always best.
Why You'll Love This Recipe
- Pantry Staples Only: I swear by this recipe because it uses what’s already in my cupboard—no specialty trips or last-minute shopping. That yeast packet, the butter sitting in my fridge, even the sugar from my coffee stash? Boom. Bread in two hours.
- Soft Gold Standard: The moment that warm, pillowy crumb hits your tongue—that’s the magic. The butter and eggs work together to give it that signature tender bite, while the sugar just adds this subtle, nostalgic sweetness that makes it impossible to stop slicing.
- Lunchbox Legend: Between us, this is the bread that actually survives the school lunch test. Toast it, butter it, or pack it plain—it stays fresh longer than store-bought and still tastes like home. My kids fight over whose lunch gets the last slice.
- Budget-Friendly Loaf: I make this at least once a month because it’s the most cost-effective way to keep bread on the table. A single batch stretches to toast, sandwiches, and French toast for days, and the ingredients? Cheaper than buying a loaf at the store every week.
Step-by-step instructions for American white bread
Here's how to make soft, pillowy white bread with a perfect crumb in just a few hours—not days.
Activate the Yeast for Maximum Rise
In a small bowl, combine the 1.25 cups warm water (about 110°F—test by touching it; it should feel warm but not hot) with the 1 tbsp granulated sugar and 2.25 tsp active dry yeast. Let it sit for 5-10 minutes until it becomes frothy and bubbly. This step ensures your yeast is alive and ready to work.
If the mixture doesn't bubble after 10 minutes, your yeast is likely dead—start over with fresh yeast. The frothiness guarantees a light, airy loaf. Once active, proceed quickly to keep the yeast happy.
Mix the Dough Until Smooth and Elastic
In the bowl of a stand mixer fitted with the dough hook, combine the 4 cups all-purpose flour, 1.5 tsp salt, and the yeast mixture. Mix on low speed for 1 minute to combine. Add the 0.5 cup softened unsalted butter, 1 whole large egg, and 0.25 cup warm milk.
Mix on medium speed for 3-4 minutes until the dough comes together and pulls away from the sides of the bowl. It should be soft, slightly tacky, and form a smooth ball. If it's too sticky, add 1 tablespoon flour at a time until it's just manageable. Overworking the dough can develop gluten too early, so stop when it's smooth but not elastic yet.
Knead the Dough Until Silky and Springy
Switch to medium-high speed and knead the dough for 5-7 minutes until it becomes smooth, elastic, and springs back slowly when poked. You'll know it's ready when it forms a window-like skin that doesn't tear easily.
If the dough feels too firm, let it rest for 5 minutes before continuing. This resting period helps the gluten relax, making it easier to handle. Once kneaded, transfer the dough to a lightly oiled bowl, cover it with a damp towel, and let it rise in a warm place for 1-1.5 hours, or until it doubles in size. A warm oven with the light on is perfect for this.
Shape and Proof for a Perfect Crumb
Punch down the risen dough to release air, then divide it into 4 equal pieces (about 8 ounces each). Roll each piece into a smooth ball, cover with a damp towel, and let them rest for 10 minutes. This rest prevents the dough from deflating when shaped.
After resting, shape each ball into a loaf by gently pressing and rolling the dough into a 10-inch log. Place the loaves seam-side down in two greased 9x5-inch loaf pans. Cover with a damp towel and let them proof for another 30-45 minutes until they rise just above the top of the pans. The dough should feel slightly spongy when pressed gently with a finger.
Bake to Golden Perfection
Preheat your oven to 375°F. Brush the tops of the loaves with a little milk for a shiny crust, then bake for 25-30 minutes until the bread is golden brown and sounds hollow when tapped on the bottom. Avoid opening the oven door during baking—this can cause the loaves to collapse.
Once baked, remove the bread from the pans and let it cool on a wire rack for at least 30 minutes before slicing. This resting time ensures the crumb sets properly, preventing a gummy texture. Slice into thick pieces for that classic American white bread experience—soft, pillowy, and perfect for sandwiches!
Pro Tips For Making American White Bread
- Proof at 78°F: DESCRIPTION: Your kitchen’s warm spot matters more than you think. Yeast works best when the dough hits 78°F during proofing—any cooler, and it’ll take forever (or never). Stick a thermometer in your dough after the first rise; if it’s below 75°F, pop it in a slightly warmed oven with the light on for 10 minutes to kickstart the action.
- Cut Butter into Flour: DESCRIPTION: Don’t melt that butter—rub it into the flour with your fingertips until it’s pea-sized and crumbly. This creates pockets for steam to escape during baking, giving you that classic soft, airy crumb instead of a dense brick. (Yes, it’s tedious, but trust me, it’s worth it.)
- Skip the Over-Kneading: DESCRIPTION: You’ll know it’s done when the dough springs back slowly after a poke and looks smooth, not sticky or gummy. Overworked gluten = tough bread. If it’s still sticky after 8–10 minutes by hand, let it rest 10 minutes and try again—no brute force needed.
- Egg Wash for Shine: DESCRIPTION: Brush the top of your shaped loaf with a beaten egg (just one yolk + a splash of water) before baking. It’s not just for looks—it adds a golden crust and helps the bread hold its shape better in the pan. (Pro move: Save the extra egg wash for toast the next morning.)
Serving suggestions for this recipe
Classic Sandwich Base
This bread is the ultimate canvas for sandwiches—its soft, pillowy texture holds up perfectly to wet ingredients like mayo, mustard, or BBQ sauce. For a classic grilled cheese, use sharp cheddar and American cheese with a touch of garlic butter for extra richness.
I love adding thin slices of tomato and lettuce for that diner-style combo. 🥪
For turkey and avocado, spread cream cheese on the bread, layer with sliced turkey, avocado, and a sprinkle of black pepper. The bread’s mild flavor lets the ingredients shine without overpowering. Wrap in parchment paper before slicing to keep everything together.
Toast Perfection
Toast your bread until it’s golden and crisp—I use a toaster oven for even browning. Top with butter and a sprinkle of flaky sea salt for a simple, satisfying snack.
For something sweeter, spread with cream cheese and drizzle with honey, then add sliced strawberries or bananas. 🍯
Make French toast by dipping slices in a mix of 2 eggs, ¼ cup milk, 1 tsp vanilla, and ½ tsp cinnamon. Cook in butter until golden and crispy. Serve with maple syrup or berry compote for a brunch favorite.
Soup Companion
Serve warm slices with creamy soups like tomato basil or chicken noodle—the bread soaks up the broth beautifully. For a heartier option, pair with clam chowder and top the bread with butter and parsley. The bread’s softness contrasts perfectly with the chunky soup. 🍲
For broth-based soups, toast the bread lightly and rub it with a garlic clove before serving. The garlic flavor pairs well with lentil soup or vegetable broth, adding an extra layer of depth.
Breakfast Staple
Use thick slices for breakfast sandwiches—layer with scrambled eggs, crispy bacon, and cheddar cheese. The bread’s softness makes it ideal for holding all the fillings without getting soggy. Add a drizzle of hot sauce for a kick. 🍳
For a quick toast, spread with peanut butter and jelly, then top with banana slices for a nostalgic treat. The bread’s mild sweetness balances the peanut butter perfectly, making it a kid-friendly favorite.
Nutrition facts
Frequently asked questions
Can I make this bread without a stand mixer?
You can mix the dough by hand using a wooden spoon or your hands. Knead the dough on a lightly floured surface for 8-10 minutes until it becomes smooth and elastic. The key is consistency—press, fold, and turn the dough repeatedly until it springs back when poked.
Why did my bread turn out dense instead of soft?
Dense bread usually happens when the yeast isn't activated properly or the dough isn't kneaded enough. Double-check that your yeast was fresh and your water was 110°F (not too hot). Also, ensure you kneaded the dough until it's smooth and elastic. If the dough didn't rise enough, try letting it proof in a warmer spot, like a turned-off oven with the light on.
How do I store leftover bread to keep it soft?
Store your bread in a paper bag at room temperature for up to 3 days. The paper bag helps retain moisture better than plastic. For longer storage, slice the bread and freeze it on a tray before transferring to a freezer bag. Toasting or warming frozen slices in the oven restores freshness perfectly.
Can I add herbs or seeds to this recipe?
Yes! For extra flavor, try adding 1 tablespoon dried herbs (like parsley or basil) or 1 tablespoon sesame seeds to the dough. Mix them in during the kneading step. Just be aware that seeds may make the bread denser, so reduce flour by 1 tablespoon if needed. The herbs will add a subtle, aromatic touch without overpowering the mild bread flavor.
What’s the best way to reheat stale bread?
For a quick fix, wrap the bread in a damp paper towel and microwave for 10-15 seconds. For a crispier texture, toast slices in a toaster oven at 375°F for 3-5 minutes. If you prefer oven reheating, brush slices with milk or water before baking to restore moisture. The bread should feel warm and soft again in no time!