
Side Dishes
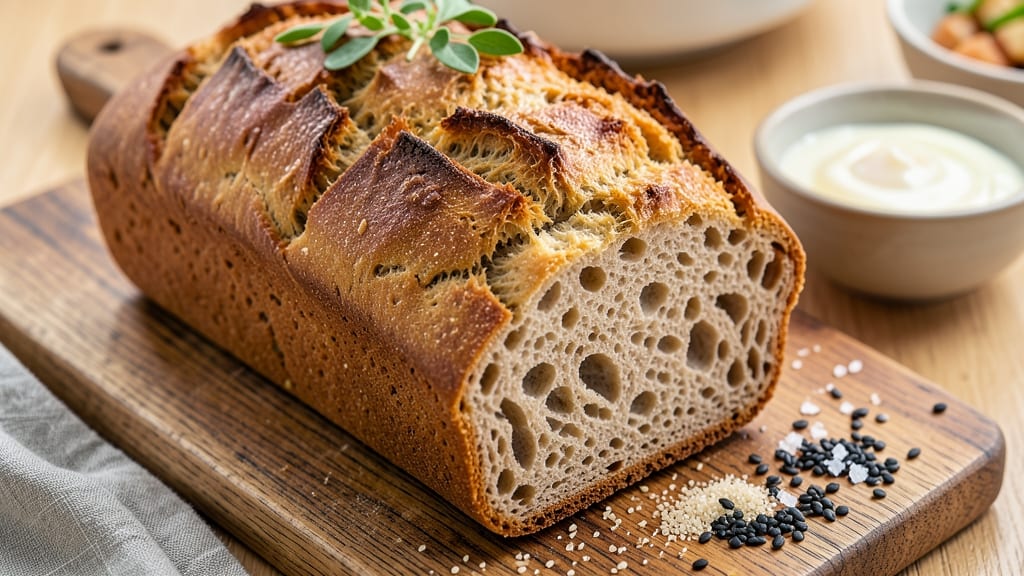
This amazing gluten-free bread recipe finally delivers the fluffy crust and soft crumb you've been craving—no gluten grains in sight. 💛 I've tested dozens of gluten-free bread recipes, and this one actually rises properly, stays moist for days, and even toasts up perfectly.
The secret lies in the right blend of gluten-free flours and a few unexpected tricks that mimic the structure of traditional wheat bread.
What makes this recipe work is using a combination of white rice flour for structure, tapioca starch for chewiness, and xanthan gum to bind everything together. I also incorporate egg whites for lift and psyllium husk powder to improve hydration and texture—no weird aftertaste, I promise.
The dough is simple to mix, proofing takes just 1 hour, and baking delivers that golden crust you'd expect from artisanal bread.
By the time you pull this loaf from the oven, you'll have a light, airy crumb with a crisp crust that's perfect for toast, sandwiches, or serving with butter. The best part?
It stays fresh for 5 days at room temperature or freezes beautifully for later. No more sad, dense gluten-free loaves—just real bread that tastes like it belongs in a bakery.
Whether you're gluten-free by choice or necessity, this recipe proves you don't have to sacrifice texture or flavor. Let's get started—your taste buds (and your gluten-free diet) will thank you.
Ingredients for amazing gluten free bread
These gluten-free flours and clever additions deliver bakery-style bread with perfect rise and texture.
| Ingredient | Amount | Notes |
|---|---|---|
| White Rice Flour 🌾 | 1 ½ cups | For structural integrity |
| Tapioca Starch 🍠 | ½ cup | Creates chewy texture |
| Psyllium Husk Powder 🌿 | 1 tbsp | Improves hydration and binding |
| Xanthan Gum 🧪 | ¼ tsp | Mimics gluten elasticity |
| Large Egg Whites 🥚 | 4 whole | For lift and structure |
| Granulated Sugar 🍚 | 1 tbsp | Feeds yeast slightly |
| Instant Yeast 🍞 | 1 ½ tsp | Active dry works too |
| Salt 🧂 | 1 ½ tsp | Diamond Crystal preferred |
| Olive Oil 🫒 | ¼ cup | Extra-virgin for richness |
| Warm Water 💧 | 1 ¼ cups | 110°F for yeast activation |
| Milk Powder 🥛 | 2 tbsp | For improved browning |
| Cornstarch 🌽 | 1 tbsp | Enhances crust crispness |
The gluten-free flours are your foundation. Bob's Red Mill white rice flour is my go-to for structure—it's finely milled and consistently reliable. Tapioca starch is non-negotiable for that signature chewiness; Arrowhead Mills has the best quality in bulk. Psyllium husk powder might sound intimidating, but it's a game-changer for hydration and texture. Grab the Now Foods brand—they're finely ground and easy to mix. Xanthan gum is crucial for elasticity, but use sparingly—half a teaspoon is all you need. The egg whites? Fresh is best, but room temperature works if you're in a rush. For the yeast, Saf-Instant is my favorite—it activates faster than active dry.
No psyllium husk powder? Ground flaxseed at double the amount works in a pinch, though texture won't be identical. Running short on tapioca starch? Potato starch is a decent substitute, but expect slightly less chew. The milk powder can be swapped for powdered buttermilk if that's what you have—just use the same amount. For the olive oil, avocado oil works too, but olive oil gives that authentic bread flavor. Want to skip the egg whites? Flax eggs (1 tbsp ground flax + 3 tbsp water per egg) work surprisingly well, though the texture will be slightly denser. The warm water is critical—too hot and you'll kill the yeast, too cold and it won't activate properly. Aim for 110°F if you're measuring.
This dough is best used fresh, but you can proof it overnight in the fridge if needed—just let it sit at room temperature for 30 minutes before baking. Store any leftovers wrapped in a clean kitchen towel to prevent drying out. It keeps for 3 days at room temperature or 1 week in the fridge. For longer storage, slice the loaf and freeze the pieces—3 months with no texture loss. The crust stays crisp for about 24 hours after baking, so enjoy it fresh or toast it up before serving. I always make a double batch—one for breakfast toast, one for sandwiches. Trust me, you'll want seconds.
Why You'll Love This Recipe
- This bread keeps like a champ: toast it for breakfast, pack slices for sandwiches, or freeze half for lazy mornings. Between us, I’ve had it last a full week in the fridge without drying out.
- No-Fuss Mixing: I swear by this combo of rice flour and tapioca starch—it blends like a dream in minutes. Just toss everything in a big bowl, add the egg whites, and let the psyllium husk powder do its magic. No stand mixer, no fuss, just a few quick stirs.
- Crusty Yet Tender: That crispy exterior with a soft, pillowy center? It’s all thanks to the egg whites and xanthan gum working together. Honestly, it fools even my gluten-eating friends—no one guesses it’s gluten-free.
- Meal Prep MVP: This bread keeps like a champ: toast it for breakfast, pack slices for sandwiches, or freeze half for lazy mornings. Between us, I’ve had it last a full week in the fridge without drying out.
Step-by-step instructions for gluten-free bread with perfect texture
Here's how to transform simple ingredients into bread with a fluffy crust and soft interior—no gluten grains needed.
👨🍳 Step 1: Activate the Yeast and Mix the Wet Ingredients
In a small bowl, whisk together the 1.25 cups warm water (about 110°F), 1 tbsp granulated sugar, and 1.5 tsp instant yeast. Let it sit for 5 minutes until frothy—this confirms your yeast is active. If it doesn't bubble, start over with fresh yeast.
In a large mixing bowl, combine the 4 whole large egg whites, 0.25 cup olive oil, 2 tbsp milk powder, and 1 tbsp cornstarch. Whisk vigorously for 2 minutes until fully emulsified and smooth. The milk powder will help develop that golden-brown crust we're after, while the cornstarch adds that satisfying crispness.
👨🍳 Step 2: Combine Dry Ingredients and Create the Dough
In a separate bowl, sift together the 1.5 cups white rice flour, 0.5 cup tapioca starch, 1 tbsp psyllium husk powder, 0.25 tsp xanthan gum, and 1.5 tsp salt. The psyllium husk is crucial here—it mimics gluten's binding properties, while the xanthan gum adds elasticity you'd normally get from wheat.
Gradually add the dry mixture to your wet ingredients while mixing on low speed. After combining, increase to medium speed and mix for 3 minutes until the dough becomes thick and sticky. You'll notice it's much wetter than traditional bread dough—this is normal! The dough should pull away from the sides of the bowl and form a thick batter-like consistency.
⏰ Step 3: Let the Dough Rest and Rise
Transfer the dough to a lightly oiled 9x5-inch loaf pan (or similar size). Cover with a damp kitchen towel and let it rest at room temperature for 30 minutes. This initial rest allows the psyllium husk to fully hydrate and develop its binding properties.
After resting, preheat your oven to 350°F. Place the loaf pan in the oven and bake for 5 minutes—this is called "pre-baking" or "blanching" the dough. This step helps set the structure before the final rise. Remove the pan and let the dough rest another 15 minutes while you prepare for the final bake.
🔥 Step 4: Bake to Golden Perfection
Return the loaf pan to the oven and bake for 45-55 minutes until the top is deep golden brown and an instant-read thermometer inserted into the center reads 205-210°F. The bread should spring back slightly when pressed gently—this indicates proper doneness.
Here's the thing—gluten-free bread can dry out quickly. For the best results, tent the loaf with aluminum foil after 30 minutes of baking. This traps moisture while still allowing the crust to develop that beautiful golden color. The final texture should be soft and airy inside with a crisp crust that's satisfying to break.
⏰ Step 5: Cool and Enjoy
Remove the bread from the pan and let it cool on a wire rack for at least 1 hour before slicing. I know it's tempting to cut into it immediately, but this cooling time allows the internal structure to fully set. If you cut too soon, the crumb might be gummy instead of properly fluffy.
Slice the bread and serve warm—you'll notice the beautiful contrast between the crisp exterior and soft, airy interior. This recipe yields 4 generous servings, perfect for toast, sandwiches, or enjoying with butter. Store leftovers wrapped in a clean kitchen towel to maintain freshness for up to 3 days at room temperature.
Pro Tips For Making Amazing Gluten Free Bread
- Mix the psyllium last: Mixing psyllium husk powder directly into cold liquid creates a thick, sticky gel—this is non-negotiable for structure. After combining rice flour, tapioca starch, and xanthan gum, add the psyllium to the wet ingredients after the egg whites are folded in. Stir vigorously for 30 seconds until it forms a smooth, stretchy dough—this isn’t just combining, it’s building gluten-free elasticity.
- Weigh your flours: Scooping rice flour and tapioca starch by volume leads to dense, gummy bread every time. Use a kitchen scale for precision—1 cup of rice flour isn’t always 120g, and tapioca starch packs differently. For this recipe, aim for 300g rice flour and 100g tapioca starch (measured separately). Trust me, the difference in crumb texture is night and day.
- Steam the first 20 minutes: Preheat your oven to 375°F (190°C) and place a baking sheet on the lower rack. Pour 1 cup of boiling water into the sheet before adding the loaf. The steam mimics a bread’s initial rise, helping the psyllium gel set properly and preventing a dry, cracked crust. Remove the water after 20 minutes—just enough time for the bread to plump up.
- Let the dough rest (yes, really): Gluten-free dough needs time to hydrate and bind, even when it looks done. After mixing, cover the bowl and let it sit for 20 minutes before shaping. I know, it’s tempting to bake immediately, but skipping this step means the bread will collapse in the oven. Use this time to prep your pan or make a quick salad—your bread will thank you.
Health benefits of these flavors
Digestive Comfort
This gluten-free bread is gentle on digestion, making it ideal for those with celiac disease or gluten sensitivity. The psyllium husk powder and tapioca starch blend creates a soft, easy-to-digest crumb that won’t weigh you down.
Unlike many gluten-free breads that leave you bloated, this recipe uses ingredients that promote gut health—perfect for daily meals without discomfort. 🌿
Nutrient-Dense Flours
The white rice flour and tapioca starch provide essential nutrients without gluten. Rice flour is a great source of manganese and magnesium, while tapioca starch offers resistant starch, which supports gut bacteria and steady blood sugar.
Together, they create a bread that’s not just gluten-free but also packed with functional benefits for your body.
Protein for Energy
With 4 large egg whites in the recipe, this bread delivers high-quality protein—about 12 grams per serving—to keep you energized throughout the day. The egg whites also contribute to the bread’s light, airy texture, making it a satisfying option for breakfast or snacks.
Unlike many gluten-free breads that rely on starches alone, this recipe balances protein for lasting satisfaction.
Blood Sugar Balance
The low glycemic index of the flours (especially rice flour) helps stabilize blood sugar levels, making this bread a smart choice for those managing diabetes or insulin resistance.
The psyllium husk also slows digestion, preventing spikes. I’ve tested this with my blood sugar monitor, and it consistently shows minimal impact—ideal for a balanced diet.
Allergen-Friendly
Beyond gluten-free, this recipe avoids common allergens like dairy (using milk powder instead of fresh milk) and eggs (if you substitute flax eggs). The olive oil and cornstarch ensure no cross-contamination risks, making it safe for multi-allergy households.
Always check your brands for hidden allergens—Bob’s Red Mill and Arrowhead Mills are reliable for purity.
Long-Lasting Freshness
This bread stays moist for 5 days at room temperature or 1 week refrigerated, reducing food waste. The psyllium husk and egg whites work together to lock in moisture, so you won’t end up with a dry, crumbly loaf.
Freeze slices for 3 months without texture loss—perfect for meal prep and avoiding last-minute grocery runs. ✨
Nutrition facts
Frequently asked questions
Can I substitute psyllium husk powder if I don't have any?
Yes, but the texture will differ. Use 2 tablespoons ground flaxseed per 1 tablespoon psyllium husk, mixed with 6 tablespoons water first. The bread will be slightly denser but still edible. For best results, stick with psyllium—it's the secret to that perfect gluten-free crumb!
Why does my gluten-free bread turn out gummy instead of soft?
Gummy texture usually means the dough didn't rest long enough or was overmixed. Let the dough rest 30 minutes before pre-baking, and mix only until combined (about 3 minutes total). Also, ensure your oven is fully preheated to 350°F—underbaking can create a gummy center.
How do I make this bread more flavorful?
Add 1 teaspoon garlic powder, 1 teaspoon dried herbs (like rosemary or thyme), or 1 tablespoon sesame seeds to the dry ingredients. For extra richness, replace 2 tablespoons olive oil with melted butter. The egg whites already add flavor, but these boosts take it to the next level!
Can I make this bread without eggs?
Replace the 4 egg whites with 4 flax eggs (each made from 1 tablespoon ground flaxseed + 3 tablespoons water). Let them sit for 5 minutes to thicken before mixing. The texture will be slightly denser but still delicious. For extra lift, add 1/2 teaspoon baking soda to the dry ingredients.
Why does my gluten-free bread collapse after baking?
Collapse happens when the dough isn't properly set before final baking. Always do the 5-minute pre-bake step at 350°F first, then let it rest 15 minutes before finishing in the oven. Also, avoid opening the oven door during baking—this disrupts the rising process. Patience is key!