
Side Dishes
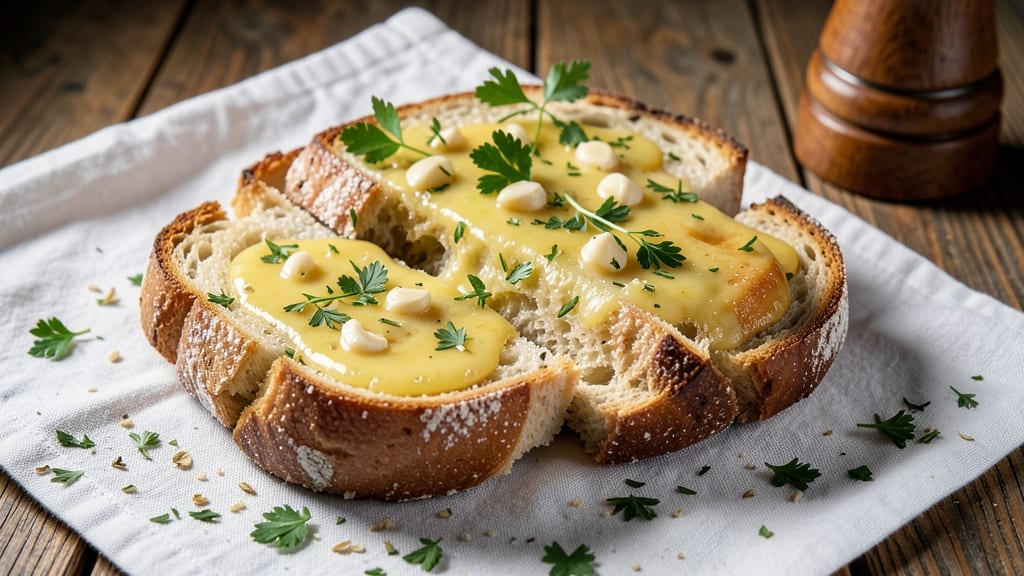
This amazing garlic bread recipe transforms simple ingredients into bakery-fresh perfection with golden, crispy layers that'll make your kitchen smell like a European café. 🌟 The secret? Fresh garlic infused in warm butter, brushed onto perfectly toasted bread, and baked until the edges are caramelized.
I've been making this version for years—it's the one that gets second helpings every time.
You don't need fancy ingredients or hours in the kitchen—just a loaf of crusty Italian or French bread, a few cloves of garlic, and some butter.
The magic happens when you toast the bread first (this is non-negotiable!) and then slather it with that rich, garlicky butter while it's still warm. It's the kind of recipe that feels indulgent but comes together in under 20 minutes.
What you'll end up with is garlic bread so good, it'll disappear faster than you can say "more butter." The crust is crispy and golden, the inside stays soft and pillowy, and every bite is packed with that irresistible garlic flavor that makes your taste buds dance.
This isn't just side dish—it's the star of the meal.
Serve it alongside marinara and meatballs, or just enjoy it on its own with a glass of wine. Trust me, once you try this version, you'll never go back to store-bought again. Let's get started—your kitchen (and your guests) will thank you.
Ingredients for amazing garlic bread
Just five core ingredients make this garlic bread smell like a Parisian bakery.
| Ingredient | Amount | Notes |
|---|---|---|
| Crusty Italian or French Bread Loaf 🍞 | 1 whole | Sliced into 1-inch pieces |
| Unsalted Butter 🧈 | ¾ cup | Cold, cubed for spreading |
| Garlic Cloves 🧄 | 6 cloves | Fresh, peeled and minced |
| Fresh Parsley 🌿 | ¼ cup | Chopped, for garnish |
| Granulated Garlic 🧄 | ½ tsp | Optional for extra flavor |
| Dried Parsley 🌿 | ½ tsp | Substitute if fresh unavailable |
| Sea Salt 🧂 | 1 tsp | Kosher or fine grain |
| Black Pepper 🌶️ | ½ tsp | Freshly ground preferred |
| Extra-Virgin Olive Oil 🫒 | 1 tbsp | For brushing bread |
| Dried Oregano 🍃 | ½ tsp | Italian blend preferred |
| Red Pepper Flakes 🌶️ | ¼ tsp | Optional for heat |
The bread is everything—crusty Italian or French loaves from Whole Foods or your local bakery work best. Avoid pre-sliced baguettes (they're too soft). Trader Joe's has great crusty loaves if you're short on time. Look for a loaf with a thick, chewy crust—it's worth the extra minute to check. If you can't find crusty bread, sourdough is the next best thing. Toast the slices first (this is non-negotiable), or they'll get soggy from the butter. I always toast mine in the oven at 350°F for 5 minutes before adding the butter—trust me, it makes all the difference.
No fresh garlic? Granulated garlic works in a pinch (use half the amount), but fresh is ideal. Penzeys sells pre-minced garlic if you hate peeling cloves. The parsley can be dried if needed—just use one-third the amount. For extra richness, swap half the butter for vegan butter if you're avoiding dairy. The olive oil is for brushing before baking—don't skip this step, or the edges won't get that perfect golden caramelization. Red pepper flakes are optional, but I always keep them on hand for a little kick. If you're feeling fancy, add a pinch of smoked paprika to the butter mix for depth.
This butter mixture keeps in the fridge for up to 1 week in an airtight container. The bread? Fresh is best, but you can toast slices ahead and store them in a paper bag at room temp for 2 days. For serving, I like to arrange the garlic bread on a wooden board with a sprinkle of fresh parsley—looks as good as it tastes. Leftovers? Freeze the butter mixture in ice cube trays for single-serving portions. Reheat in the microwave for 20 seconds, then brush onto toasted bread. Pro tip: Double the recipe—it disappears faster than you can say 'second helping.'
Why You'll Love This Recipe
- Here’s what sold me: that perfect contrast—crispy golden edges with a gooey, buttery center. The fresh parsley brightens it up, and the granulated garlic (mixed into the butter) means every bite is packed with flavor without tasting like you’re chewing on a clove.
- I’ll be real: I’ve reheated this garlic bread the next day, and it’s still solid. The crust stays crispy if you toast it fresh, and the flavor only gets deeper. Plus, it’s cheap—one loaf stretches for two meals, and you’re using pantry staples. Budget win, flavor win.
Step-by-step instructions for garlic bread that stuns
Here's how to transform simple bread into bakery-worthy perfection.
👨🍳 Step 1: Prep the Bread for Maximum Flavor
Start by slicing the 1 whole Crusty Italian or French Bread Loaf into 1-inch thick pieces. I like to cut each slice diagonally for extra surface area to soak up the butter. Arrange the slices on a baking sheet, slightly overlapping if needed, and brush both sides generously with 1 tablespoon Extra-Virgin Olive Oil. This creates a golden base before we add the butter.
Real talk: don't skip this oiling step. The oil prevents the bread from drying out during the toasting process and helps the butter spread more evenly. You'll know you've done it right when the bread looks glossy and inviting.
🍳 Step 2: Create the Ultimate Garlic Butter
In a medium bowl, combine the 0.75 cup cold cubed Unsalted Butter with 6 cloves minced Garlic Cloves, 1 teaspoon Sea Salt, 0.5 teaspoon Black Pepper, 0.5 teaspoon Dried Oregano, and 0.25 teaspoon Red Pepper Flakes. Mix gently with a fork until the butter is fully softened and the spices are evenly distributed throughout.
Here's the thing - using cold butter cubes is crucial. They melt beautifully when heated, creating pockets of air that make the bread light and fluffy. If your butter is too soft, chill the mixture for 10-15 minutes before spreading. The cold butter should still hold its shape slightly when pressed.
🍳 Step 3: Spread Like a Pro (This Makes All the Difference!)
Working quickly, spread the garlic butter mixture generously over each slice of bread, using about 1 tablespoon per slice. I press down gently with the back of a spoon to ensure the butter penetrates all the way through. This isn't just about flavor - it's about creating that signature crispy crust with a gooey, melty center.
Don't be shy with the butter. You want every bite to be rich and flavorful. If you're worried about too much butter, remember - we're about to toast this until it's golden and crispy, so the excess will melt away beautifully. Save any leftover garlic butter for dipping or topping pasta later!
🔥 Step 4: Toast to Perfect Golden Perfection
Preheat your oven to 375°F. Arrange the buttered bread slices on a baking sheet in a single layer, leaving about ½ inch between each piece. Bake for 8-10 minutes until the edges are deep golden brown and the bread is crispy to the touch.
Watch carefully during the last 2 minutes of baking. The bread should be golden but not burnt. If it's browning too quickly, tent it loosely with aluminum foil. The perfect slice will have a crisp exterior that gives way to warm, buttery bread underneath. This is where the magic happens - that beautiful contrast of textures!
👨🍳 Step 5: Garnish and Serve Immediately
Remove the bread from the oven and immediately sprinkle each slice with 0.25 cup chopped Fresh Parsley and, if using, 0.5 teaspoon Granulated Garlic for that extra punch of flavor. The parsley adds freshness that cuts through the richness of the butter.
Serve while still warm for the ultimate experience. Each bite should deliver crispy, buttery layers with that irresistible garlic flavor. If you're making this ahead, reheat in the oven for 2-3 minutes at 350°F to restore that perfect texture. Trust me, fresh out of the oven is when it's truly amazing!
Pro Tips For Making Amazing Garlic Bread
- TOAST THE GARLIC FIRST: Slice the cloves in half lengthwise and let them sit on a dry pan over medium heat for 30 seconds—just until fragrant. That quick toast deepens the flavor without burning it, and it sticks better to the butter later. (Yes, even if you’re impatient like me, resist the urge to rush this.)
- SLICE THE BREAD THICK: Cut the loaf into ¾-inch slices—thicker than most recipes suggest. Thin slices dry out faster, and you’ll end up with sad, crispy edges and gummy centers. Thick slices hold the butter-garlic mix better and stay tender longer.
- MIX THE BUTTER COLD: Take the unsalted butter straight from the fridge and mix it with the minced garlic and parsley—no melting first. Cold butter spreads more evenly, coats the bread like armor, and gives you that perfect balance of crispy crust and gooey interior. (I learned this the hard way after making a buttery mess.)
- BAKE ON HIGH HEAT: Preheat your oven to 425°F (220°C) and bake the garlic bread on the top rack—no middle shelf. High heat ensures the bread gets golden and crispy in 8–10 minutes, not soggy and undercooked. (Your future self will thank you for skipping the broiler, which burns it faster than you can react.)
Dietary considerations for amazing garlic bread
Gluten-Free Adaptations
For gluten-free versions, swap the traditional bread for a gluten-free baguette or ciabatta made from almond or brown rice flour. I love Canyon Bakehouse or Schär brands—they hold up well to the buttery toasting.
Use 1 extra tablespoon olive oil per loaf to compensate for the drier texture of GF bread. 🌟
Dairy-Free Options
Replace butter with vegan butter (like Miyoko's or Earth Balance) or olive oil for a dairy-free twist. For extra richness, blend ¼ cup cashew butter with ¼ cup olive oil and 1 tsp nutritional yeast to mimic the creamy texture. The flavor stays bold, just without the dairy. ✨
Low-Carb Versions
Cut carbs by using low-carb bread like Caulipower or Larabar bread. These hold up well to the garlic butter and add a nutty depth. For a keto-friendly option, toast portobello mushroom slices (about ½-inch thick) for 5 minutes at 375°F, then slather with the garlic butter. 💪
Allergen-Friendly Swaps
For nut allergies, use sunflower seed butter (like SunButter) mixed with olive oil for the dairy-free base. If avoiding garlic, substitute 1 tsp asafetida powder (hing) for a similar umami punch. Always check labels—some GF breads contain hidden dairy or nuts. 🌿
Vegan-Friendly Upgrade
Combine vegan butter, olive oil, and 1 tbsp lemon juice for a tangy, dairy-free garlic butter. Add 1 tsp miso paste for depth. Serve with roasted garlic hummus for dipping—this combo is restaurant-worthy and fully plant-based. 🌱
Nutrition facts
Frequently asked questions
Can I make this garlic bread ahead of time?
Yes, but with a few key tweaks! Toast the bread slices first and store them in a paper bag at room temperature for up to 2 days. Keep the garlic butter mixture separate in an airtight container in the fridge. When ready to serve, simply reheat the bread in the oven at 350°F for 2-3 minutes and spread with the butter while warm. The texture won't be quite as crispy as fresh, but it'll still be delicious.
What's the best bread to use for maximum flavor?
For that authentic bakery experience, go for a crusty Italian or French bread with a thick, chewy crust. Look for loaves with a deep golden color and a firm texture—these hold up best to the buttery toasting. If you can't find crusty bread, sourdough is the next best option. Avoid pre-sliced baguettes or soft sandwich bread—they'll get soggy from the butter.
How do I prevent the garlic butter from making the bread soggy?
Prevent sogginess by toasting the bread first! Brush the slices with olive oil and toast them in the oven at 350°F for 5 minutes before adding the garlic butter. This creates a crisp base that holds up to the rich butter mixture. Also, work quickly when spreading the butter—don't let it sit too long on the bread before baking. The 8-10 minutes in the oven at 375°F will crisp it up perfectly.
Can I use garlic powder instead of fresh garlic?
You can, but fresh garlic makes all the difference! If you're short on time, use ½ teaspoon granulated garlic as a substitute, but it won't have the same depth of flavor. For extra richness, add ½ teaspoon garlic powder to the butter mixture along with the granulated garlic. Fresh garlic releases aromatic oils when heated, creating that signature garlic flavor that's hard to replicate with powder alone.
What's the secret to getting the perfect crispy crust?
The secret lies in two steps: toasting the bread first and baking it at the right temperature. Start by oiling the bread and toasting it at 350°F for 5 minutes to create a crisp base. Then bake the buttered slices at 375°F for 8-10 minutes. Watch closely during the last 2 minutes—the bread should be deep golden brown. If it's browning too quickly, tent it with foil. The contrast of crispy edges and soft interior is what makes this garlic bread truly amazing!