
Side Dishes
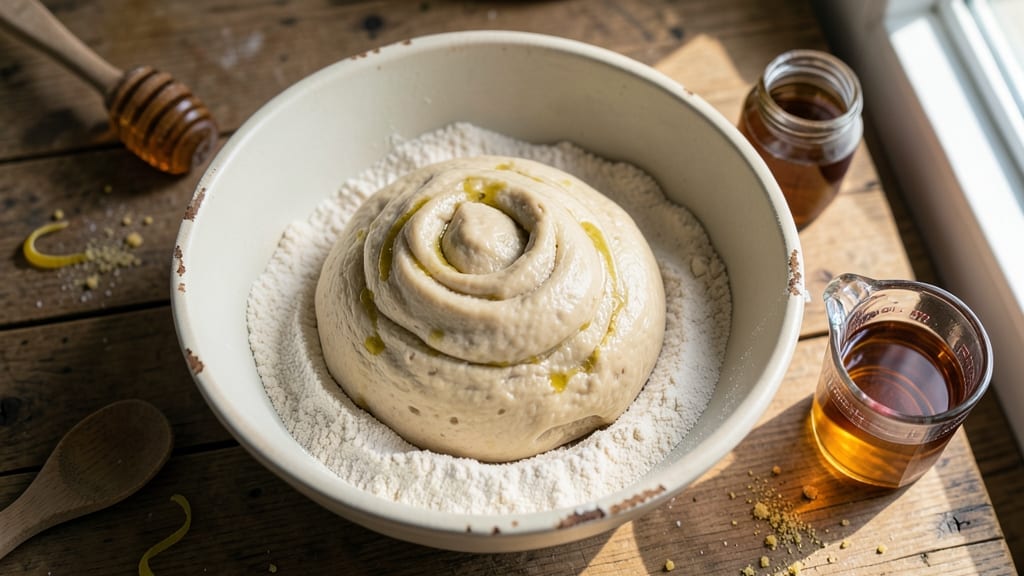
This almost no-knead bread recipe delivers restaurant-quality crust with a golden, crackling exterior and a soft, airy interior—all with minimal effort. The secret lies in a simple dough of flour, yeast, water, and salt that develops its texture overnight, requiring no kneading or advanced techniques.
I’ve perfected this method to ensure foolproof results, even for beginners, while keeping the process straightforward and rewarding.
The Dutch oven method is key here, trapping steam to create that coveted crispy crust while keeping the crumb tender. With just a few ingredients and a 30-minute prep time, you’ll have bread that tastes like it came from a bakery.
The honeyed sweetness adds a subtle depth, making it perfect for sandwiches, toast, or serving alongside soups and stews.
What sets this recipe apart is its simplicity—no fancy equipment, no complicated steps, just a few hours of hands-off time. The dough rests overnight, allowing the flour to fully hydrate and develop flavor, while the Dutch oven baking ensures a perfect crust every time.
Whether you’re a seasoned baker or just starting out, this method guarantees success.
Once baked, the bread stays fresh for days, making it ideal for meal prep or gifting. For added flavor, try mixing in seeds, herbs, or a touch of garlic into the dough before baking. Let’s get started on creating your own loaf of artisanal bread at home!
Ingredients for almost no knead bread
Four simple ingredients transform into restaurant-quality bread with just 30 minutes prep.
| Ingredient | Amount | Notes |
|---|---|---|
| All-Purpose Flour 🌾 | 4 cups | Unbleached preferred for better texture |
| Active Dry Yeast 🍞 | ¼ tsp | Ensure yeast is fresh for best rise |
| Honey 🍯 | ¼ cup | Light color for subtle sweetness |
| Warm Water 💧 | 1 ½ cups | 105°F to activate yeast properly |
| Kosher Salt 🧂 | 1 tsp | Diamond Crystal preferred |
| Olive Oil 🫒 | 1 tbsp | Extra-virgin for richness |
| Cornmeal 🌽 | ¼ cup | For dusting Dutch oven |
| Coarse Sea Salt 🧂 | 1 tbsp | For sprinkling crust |
The flour makes all the difference here. King Arthur or Bob's Red Mill are my go-tos—they hydrate beautifully for that perfect open crumb. Active dry yeast should be no older than 4 months; check the date on the package. Honey isn't just sweetness—it feeds the yeast during the overnight rise. Local honey adds subtle floral notes, but store-bought works fine too. Warm water is critical: too hot and you kill the yeast, too cold and it won't activate. Aim for 105°F—just warm to the touch.
No honey? Maple syrup or agave work in a pinch (use same amount). Running short on yeast? Instant yeast at half the amount works too—just mix it directly with the flour. Diamond Crystal kosher salt is ideal, but Morton works fine if that's what you've got. For the olive oil, any neutral oil (like vegetable) will do, but extra-virgin adds that bakery-fresh flavor. Cornmeal can be swapped for semolina or flour if needed—just don't skip it entirely. The coarse sea salt on top? That's what creates the signature crunch.
Once mixed, the dough keeps 24 hours in the fridge before baking—perfect for meal prep. After baking, store wrapped at room temperature for 3 days or freeze for 3 months. The crust stays crisp for 2 days if you slice and freeze it. For extra flavor, try adding 1 tsp garlic powder or 1 tbsp sesame seeds to the dough before shaping. The Dutch oven method means you'll need to preheat it in the oven for 30 minutes—don't skip this step!
Why You'll Love This Recipe
- Ditch the Kneading: Mixing this dough takes three minutes—just flour, yeast, honey, and water. No punchy arms, no sticky mess, just a bowl and a spoon. Honestly, I’ve made it while waiting for pasta to boil.
- Honey’s Secret Boost: That spoonful of honey isn’t just sweet—it caramelizes in the oven, giving the crust a golden crack and the crumb a subtle depth. Not cloying, not artificial, just good.
- Weeknight Superstar: Toss a loaf in the oven while you prep dinner—it’s done by the time you’re plating. Between us, I’ve used it for sandwiches, toast, and even croutons. The bread never goes to waste.
- Budget Bread Magic: Five ingredients, zero fancy tools. You’re not just feeding your family—you’re stretching your grocery budget. My kids still ask for it, even when I buy store bread. (Yes, even on a Tuesday night.)
Step-by-step instructions for almost no-knead bread
Here's the method that delivers bakery-quality bread with minimal effort and maximum flavor.
Mix the Dough and Let It Rest
In a large mixing bowl, combine the 4 cups all-purpose flour and 1 teaspoon kosher salt. Make a well in the center and add the 0.25 teaspoon active dry yeast, 0.25 cup honey, 1 tablespoon olive oil, and 1.5 cups warm water (about 105°F). Using a wooden spoon, stir until just combined—you'll see a shaggy dough form with some dry flour remaining.
Cover the bowl with a clean kitchen towel or plastic wrap and let it rest at room temperature for 12-18 hours. This long fermentation develops deep flavor and creates that signature open crumb. I like to place my bowl in a slightly warm spot, like near the oven with the light on, to encourage activity. After resting, the dough should be bubbly and nearly doubled in size.
Shape and Prep the Dutch Oven
Lightly flour a clean surface and turn out the rested dough. Gently fold it over itself 2-3 times to develop surface tension, then shape into a loose round by pulling the edges toward the center. Place the dough seam-side up in a bowl, cover, and let it rest for another 1 hour at room temperature. This final rise gives the bread its structure.
While the dough rests, preheat your oven to 450°F. Place a Dutch oven (with lid) in the oven to heat for 30 minutes. Then, remove the Dutch oven and sprinkle 0.25 cup cornmeal evenly on the bottom to prevent sticking. The hot Dutch oven creates that iconic crispy crust we're after.
Bake for a Crispy Crust
Carefully transfer the dough to the hot Dutch oven using a well-floured towel or peel. Sprinkle the top generously with 1 tablespoon coarse sea salt. Cover the Dutch oven with the lid and bake for 30 minutes. Then, remove the lid and bake for another 10-15 minutes until the bread is deep golden brown and sounds hollow when tapped on the bottom.
Here's the thing—don't peek during the first 30 minutes. Every time you open the lid, you release steam and potentially lose that perfect crust. The bread is done when it reaches an internal temperature of 205-210°F and has a beautiful caramelized crust. The honey will give it a subtle sweetness that pairs perfectly with the crispy exterior.
Cool and Serve
Remove the bread from the Dutch oven and place it on a wire rack to cool completely. This is crucial—cooling prevents the bread from becoming gummy. I know it's tempting to slice into it warm, but resist! The texture will be much better once fully cooled, and the crumb will be more open and inviting.
Once cooled, slice the bread and serve it warm with butter or jam. The crust should be crispy enough to stand up to a knife, while the interior remains soft and airy. This bread keeps well at room temperature for 2-3 days or can be frozen for up to 3 months for freshness whenever you need it.
Pro Tips For Making Almost No Knead Bread
- MEASURE WATER AT 90°F: I learned this the hard way—yeast hates extremes, and lukewarm water (90°F) is the sweet spot for this recipe. Too hot and it kills the yeast; too cold and it won’t activate properly. Use a thermometer if you’re unsure, or test the water by dipping your wrist in—it should feel like a warm bath, not a sauna or a pool.
- WEIGH YOUR FLOUR: Skip the scooping and scooping again—this recipe demands accuracy. A kitchen scale ensures you’re using 500g of flour (not the 450g you’ll get from volume measurements). The dough’s structure depends on this, and no one wants a dense loaf because you eyeballed it.
- STOP STIRRING AFTER 30 SECONDS: I used to mix this dough until it looked "done," but overworking it develops gluten and turns your no-knead bread into a chewy, dense brick. Stir just until the flour disappears—about 30 seconds—and let the yeast do the rest. The dough will come together on its own.
- USE A LARGE BOWL (REALLY): This isn’t the time to repurpose your tiny mixing bowl. The dough roughly doubles in size overnight, so if it’s crammed, it’ll spill everywhere when you try to shape it. Use a bowl that’s at least 5-quart capacity—your future self will thank you when you’re not scraping dough off the counter.
Pro cooking tips for great almost no knead bread
Dough Development
Let the dough rest for 12-18 hours at room temperature—this is where the magic happens. The long fermentation time allows the gluten to relax and develop fully without kneading, creating that signature open crumb.
I like to place my bowl near the oven with the light on to create a slightly warm environment, which helps the yeast stay active. If your kitchen is cold, a proofing box or even a warm oven with the light on works perfectly.
The dough should nearly double in size and become bubbly—this means it's ready for shaping. 🌟
Shaping Like a Pro
When shaping, avoid overworking the dough—just fold it over itself 2-3 times to tighten the surface. Think of it like tucking in a blanket rather than kneading. Place the dough seam-side up in a bowl and let it rest for 1 hour before baking.
This final rise is crucial for structure and flavor. If your dough isn't rising enough, it might be too cold—try moving it to a warmer spot or covering it with a towel to trap heat.
Dutch Oven Prep
Preheating the Dutch oven is non-negotiable—it creates that iconic crispy crust. Place it in the oven for 30 minutes before adding the dough. Sprinkle ¼ cup cornmeal on the bottom to prevent sticking, and avoid using flour here—it can burn easily.
If you don’t have a Dutch oven, a heavy oven-safe pot with a lid works in a pinch. Just make sure it’s large enough to accommodate the dough’s expansion. The hot Dutch oven traps steam, which is key for that bakery-style crust. ⚡
Baking Without Peeking
Resist the urge to open the lid during the first 30 minutes of baking—every time you peek, you release steam, which can weaken the crust. The bread is done when it reaches an internal temperature of 205-210°F and sounds hollow when tapped on the bottom.
If the top browns too quickly, tent it loosely with foil. The honey in the dough caramelizes beautifully during baking, adding a subtle sweetness that balances the crust’s crispiness. 🔥
Cooling for Perfection
Patience is key here—let the bread cool completely on a wire rack before slicing. This prevents a gummy texture and allows the crumb to set properly. I know it’s tempting to dig in right away, but trust me, the wait is worth it.
Once cooled, the crust should be crisp enough to stand up to a knife, while the interior remains soft and airy. Store any leftovers in an airtight container to keep them fresh for up to 3 days.
Troubleshooting Tips
If your dough doesn’t rise enough, it might be too cold or the yeast is old. Try warming the water slightly (105-110°F) and using fresh yeast. For a denser loaf, overproofing could be the issue—shape and bake the dough sooner if it’s rising too quickly.
If the crust isn’t crispy enough, ensure your Dutch oven is hot enough before adding the dough. A thermometer can help monitor the oven temperature if you’re unsure. 💡
Nutrition facts
Frequently asked questions
Can I make this bread without a Dutch oven?
Yes! If you don't have a Dutch oven, use a heavy oven-safe pot with a lid or even a baking stone. Preheat your oven to 450°F and place the pot inside for 30 minutes before adding the dough. For a baking stone, bake on the lower rack for 20 minutes covered with foil, then 10-15 minutes uncovered. The key is trapping steam to create that crispy crust.
Why does my dough take longer than 12 hours to rise?
Cold temperatures slow yeast activity, so if your kitchen is chilly, try placing the dough near the oven with the light on or use a proofing box set to 75-80°F. Also check your yeast—if it's old or expired, it won't activate properly. Fresh yeast should make the dough nearly double in 12-18 hours at room temperature.
Can I add other ingredients like seeds or herbs?
Mix in 1-2 tablespoons of seeds (sesame, poppy, or flax) or 1 teaspoon of dried herbs (rosemary, thyme) directly into the flour before adding liquid. For fresh herbs like garlic or basil, chop them finely and fold into the dough after the initial mixing. Just be mindful not to overwork the dough during shaping.
How do I know when the bread is fully baked?
Your bread is done when it reaches an internal temperature of 205-210°F and sounds hollow when tapped on the bottom. The crust should also be deep golden brown. Avoid relying solely on color—some ovens brown faster than others. For best results, use an oven thermometer to ensure accurate temperature.
Can I freeze this bread for later?
Yes! Cool the bread completely, then slice it and wrap each slice in plastic wrap. Store in a freezer bag for up to 3 months. For whole loaves, freeze the baked bread (unwrapped) for 3 months, then thaw at room temperature. To revive the crust, warm slices in a 350°F oven for 5-10 minutes before serving.