
Side Dishes
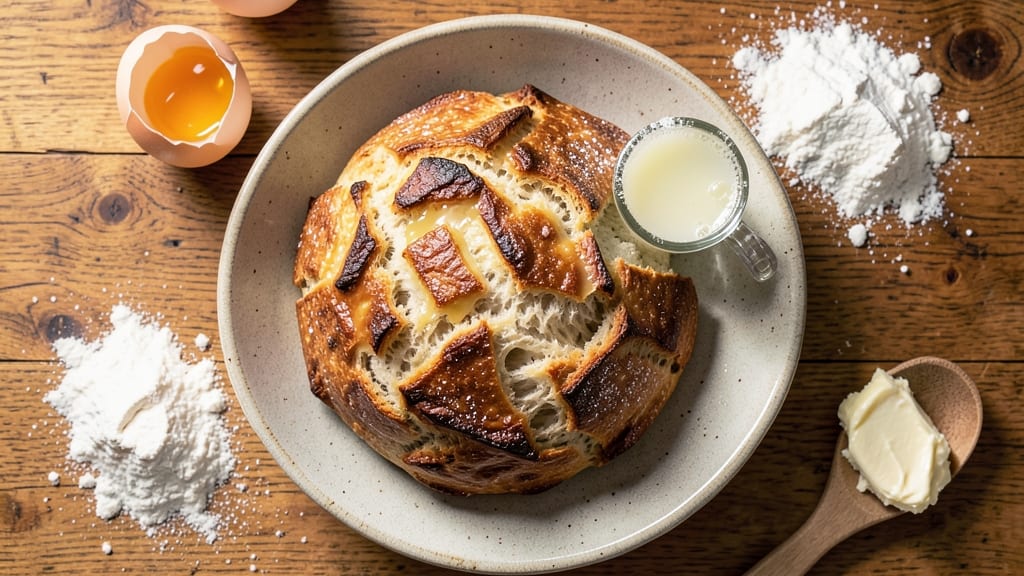
This acid whey bread recipe transforms a byproduct into a tangy, textured loaf with a satisfying crust and tender crumb—perfect for reducing waste while elevating your bread game.
The key lies in acid whey, a natural leftover from cheese-making that adds subtle tang and improves gluten development, creating a bread with depth and character. Unlike traditional recipes, this method repurposes what might otherwise go unused, making it both practical and rewarding.
The process begins with a simple dough enriched by acid whey, which enhances fermentation and yields a lighter, more flavorful loaf. You’ll shape it into a classic round or rustic boules, then bake until golden brown, achieving that coveted crusty exterior with a soft interior.
This isn’t just bread—it’s a versatile staple that pairs beautifully with soups, stews, or even as a side to hearty mains.
What sets this recipe apart is its dual-purpose ingenuity: it’s a solution for those with access to acid whey (like homemade cheese makers) and a delicious bread for anyone.
The tangy notes from the whey linger just beneath the surface, adding complexity without overpowering. Whether you’re baking for tradition or sustainability, this loaf delivers restaurant-quality results with minimal effort.
Ready to bake? The dough requires just 30 minutes of prep, followed by a 1- to 2-hour rise, and a 40-minute bake—ideal for a weekend project.
Once cooled, slice it thick for sandwiches or serve it warm with butter. The possibilities are endless, and the satisfaction of turning a byproduct into something extraordinary is unmatched.
Ingredients for acid whey bread
Transform byproduct into a tangy, restaurant-quality loaf with just these 11 ingredients.
| Ingredient | Amount | Notes |
|---|---|---|
| Acid Whey 🥛 | 1 cup | Fresh from cheese-making, room temperature |
| All-Purpose Flour 🌾 | 4 cups | High-protein, bread flour preferred |
| Active Dry Yeast 🍞 | 2 ¼ tsp | Instant yeast works too |
| Granulated Sugar 🍚 | 1 tbsp | For yeast activation |
| Unsalted Butter 🧈 | ½ cup | Cold, cubed for texture |
| Large Eggs 🥚 | 1 whole | Room temperature for best mixing |
| Diamond Crystal Kosher Salt 🧂 | 1 ½ tsp | Adjust to taste |
| Extra-Virgin Olive Oil 🫒 | 2 tbsp | For dough handling |
| Cornmeal 🌽 | ¼ cup | For dusting work surface |
| Water 💧 | ½ cup | Lukewarm for yeast activation |
| Sesame Seeds 🌿 | 1 tbsp | Optional for topping |
Acid whey is the star here—fresh from your cheese-making is ideal, but store-bought buttermilk or plain yogurt works in a pinch (reduce by 1/4 cup). Look for high-protein bread flour at specialty stores like King Arthur Flour or bulk bins for the best gluten development. The butter should be cold but not frozen—European-style unsalted like Plugrá adds extra richness. If you don’t have sesame seeds, poppy seeds or everything bagel seasoning gives a nice contrast.
No acid whey? Substitute with 1/2 cup buttermilk plus 1/2 cup water—the tang is key for that signature depth. Using instant yeast? Skip the proofing step entirely—just mix it straight into the flour. The dough will feel slightly tackier than usual thanks to the whey, but don’t panic—it’s normal. For a nutty flavor, swap 1/2 cup of the all-purpose flour for whole wheat or rye. The olive oil matters here—low-acidity varieties like Colavita keep the dough from becoming too sour.
This dough keeps beautifully—3 days refrigerated or 3 months frozen as a shaped loaf. For freezing, wrap tightly in plastic and place in a second bag. Thaw overnight in the fridge before baking. The crust develops best when baked in a preheated Dutch oven—if you don’t have one, use a baking sheet with a metal bowl inverted over the loaf. Leftovers? Toast them for crunchy croutons or freeze for homemade breadcrumbs.
Why You'll Love This Recipe
- Tangy Twist Ready: I’ll be real—adding acid whey to bread is not common, but it’s what makes this stand out. That slight tang cuts through the richness of the butter and sugar, giving you a flavor profile that’s fresh yet comforting. It’s the kind of bread that makes you pause mid-slice and think, "Wait, why haven’t I done this before?"
- No-Knead Magic: Honestly, this dough comes together with zero fuss. Just mix the flour, yeast, sugar, and melted butter, then fold in that acid whey—no standing at the counter, no overworking the gluten. It’s the kind of recipe that lets you multitask (or scroll TikTok) while the yeast does its thing.
- Breakfast to Picnic: Between us, this bread is a chameleon. Toast it for breakfast with jam or butter, pack it for lunch with charcuterie, or serve warm with soup—it’s that adaptable. And because it’s yeast-based, it keeps well for days, so you’re not stuck making a new loaf every other day.
- Pantry Goldmine: Here’s what sold me—this recipe uses ingredients you’re already buying. Acid whey? Probably sitting in your fridge from cheese-making. Butter, flour, yeast? Basics. No specialty trips, no wasted money. Plus, the leftovers? They’re the kind of bread that gets repurposed into croutons or French toast before you even notice they’re gone.
Step-by-step instructions for acid whey bread
This dough transforms humble pantry staples into a tangy, crusty loaf with an open crumb.
Activate the Yeast with Acid Whey
In a small mixing bowl, combine the 1 cup acid whey with 1 tablespoon granulated sugar and 0.5 cup lukewarm water (about 105°F). Stir until the sugar dissolves completely. This acidic environment is perfect for yeast activation.
Sprinkle the 2.25 teaspoons active dry yeast over the liquid and let it sit for 10-15 minutes until it becomes frothy and bubbles vigorously. The yeast should nearly double in volume and develop a strong, slightly tangy aroma. If it doesn't activate, your yeast may be dead—start over with fresh yeast. This step is critical because the acid whey gives the bread its signature tangy depth while ensuring proper fermentation.
Mix the Dough with Butter and Egg
In the bowl of a stand mixer fitted with the dough hook attachment, combine the 4 cups all-purpose flour and 1.5 teaspoons diamond crystal kosher salt. Mix on low speed until evenly distributed. Add the 1 whole large egg and 2 tablespoons extra-virgin olive oil to the yeast mixture and whisk briefly to combine.
With the mixer running on low speed, gradually pour the yeast mixture into the flour mixture. Mix for 2 minutes until a shaggy dough forms. Add the 0.5 cup cold cubed unsalted butter and continue mixing for another 3-4 minutes until the dough comes together and pulls away from the sides of the bowl. The dough should be slightly sticky but not wet. If it's too sticky, add 1 tablespoon flour at a time until it reaches the right consistency. The butter adds richness and creates that beautiful, tender crumb.
Knead Until Elastic and Smooth
Increase the mixer speed to medium and knead the dough for 8-10 minutes until it becomes smooth, elastic, and slightly springy. Press the dough gently with your finger—if it springs back slowly, it's ready. If it sticks to your finger, knead for another 2-3 minutes. The dough should pass the "windowpane test": stretch a small piece thin enough to see light through it without tearing.
Transfer the dough to a lightly oiled bowl, cover it with a damp kitchen towel, and let it rise in a warm place (like the top of the fridge or near a slightly warm oven) for 1-2 hours, or until it has doubled in size. The dough should feel light and airy when pressed gently. This rising time allows the gluten to relax and develop, creating that signature open crumb structure. Don't rush this step—patience here makes all the difference.
Shape and Proof the Dough
Turn the risen dough out onto a surface lightly dusted with 0.25 cup cornmeal. Gently deflate the dough and shape it into a round loaf, tucking the edges under as you go. Place the shaped dough seam-side down in a greased 9-inch loaf pan. Cover the pan with a damp towel and let it proof for another 30-45 minutes until it has risen about 1 inch above the rim of the pan. The dough should feel slightly firm to the touch but still springy.
Preheat your oven to 375°F while the dough proofs. Just before baking, brush the top of the dough with a little extra-virgin olive oil and sprinkle with 1 tablespoon sesame seeds for a nutty, crunchy finish. The sesame seeds add texture contrast and a subtle aroma that pairs beautifully with the tangy interior. If you prefer, you can also score the top with a sharp knife for a rustic look.
Bake to Golden Perfection
Bake the bread for 40-45 minutes until the top is golden brown and the internal temperature reaches 190°F. The loaf should sound hollow when tapped on the bottom. If the top browns too quickly, tent the pan loosely with aluminum foil to prevent over-browning while allowing steam to escape.
Remove the bread from the oven and let it cool in the pan for 10 minutes before transferring it to a wire rack to cool completely. This resting period allows the bread to set and prevents a gummy crumb. Once cooled, slice into thick pieces to reveal that beautiful open crumb structure. The crust should be crisp and slightly chewy, while the interior should be soft, tangy, and lightly aerated. Serve warm with butter or your favorite jam for the ultimate experience.
Pro Tips For Making Acid Whey Bread
- Warm the Whey: Acid whey is cold straight from fermentation—pour it into your mixing bowl first, then add it to the flour. This prevents the yeast from going into shock, and your dough will wake up faster. I learned this the hard way when my first batch took forever to rise.
- Measure Butter Precisely: Unsalted butter matters here—pack it tightly into the measuring cup to avoid air pockets. Too much butter = dense bread; too little = dry crumb. My grandmother swore by this, and she was right: a scale makes it foolproof, but if you’re eyeballing it, use a slightly rounded cup.
- Skip the Over-Kneading: Acid whey makes dough stickier than usual—resist the urge to knead like you’re punishing it. Three to four minutes by hand (or 3-4 cycles in a stand mixer) is enough. Overwork it, and you’ll end up with a tough, chewy loaf instead of the tender crumb you want.
- Proof in a Drawer: Turn off your oven, place a bowl of warm water inside, and let the dough rise there. The trapped heat keeps it cozy without overproofing—no more sad, flat loaves. Works like a charm, even if you’re not baking anything else that day.
Regional styles of this dish
Balkan Tradition
The acid whey bread recipe originated in Balkan regions where cheese-making is deeply rooted in tradition. In countries like Serbia, Croatia, and Bosnia, acid whey—called kiseljak—was historically used to make lepinja, a rustic flatbread with a tangy profile.
The whey's natural acidity tenderizes the dough while adding complexity, creating a bread that's both hearty and delicate. I remember my grandmother using homemade whey from her sheep's milk cheese to make this bread—it was always the centerpiece of our holiday tables. 🌟
Italian Rustic Style
In Northern Italy, particularly in regions like Lombardy and Piedmont, acid whey bread takes the form of panettone or pane di latte. The Italians call it pane acido and often incorporate it into ciabatta-style loaves for a lighter, airier texture.
The whey replaces some of the water in the dough, creating a bread with a slightly sour edge that pairs perfectly with rich cheeses like taleggio or gorgonzola. I love adding a pinch of nutmeg to the dough for a warm, aromatic twist that feels distinctly Italian. 🍷
Scandinavian Sourdough Twist
Nordic bakers have adapted this technique into their sourdough traditions, creating a hybrid bread that combines the tang of whey with the complexity of a natural starter. In Sweden and Norway, surströmming (fermented herring) lovers often pair their fish with this bread to cut through the strong flavors.
The whey adds a subtle lactic note that complements the funky, fermented profile of the starter. For a Scandinavian touch, I like to add cardamom to the dough—just ½ teaspoon—for a fragrant, slightly sweet contrast. ❄️
American Artisan Adaptation
Modern American bakers have embraced acid whey bread as a sustainable, flavorful alternative to traditional sourdough. Many artisanal bakeries in the Pacific Northwest and Midwest use it as a way to reduce food waste while creating a bread with a distinctive tang.
I’ve seen variations where bakers add honey or maple syrup to the dough for a subtle sweetness that balances the acidity. For a truly American touch, try topping the bread with everything bagel seasoning before baking—it adds a crunchy, savory finish that’s hard to resist. 🌽
Middle Eastern Flatbread
In countries like Turkey and Lebanon, acid whey is used to make lavash or pide, a thin, chewy flatbread that’s perfect for wrapping around grilled meats or dipping in olive oil. The whey keeps the dough supple and prevents cracking, even when baked at high temperatures.
For a Middle Eastern-inspired version, I like to shape the dough into a thin oval and bake it on a cast-iron skillet until blistered and golden. Serve it warm with za’atar and olive oil for a flavor explosion. 🌿
Modern Fusion Loaf
Today’s bakers are getting creative with acid whey bread by incorporating global flavors. For example, adding miso paste to the dough creates a Japanese-inspired loaf with umami depth, while a sprinkle of fennel pollen gives it a licorice-like aroma.
I once made a version with smoked paprika and garlic for a Spanish-inspired twist—it was a hit at my dinner party! The beauty of this bread is its versatility—you can tailor it to any cuisine while keeping the core tangy, whey-driven flavor intact. 🔥
Nutrition facts
Frequently asked questions
Why does acid whey make the bread tangy?
The natural lactic acid in acid whey creates a subtle tang that develops during fermentation. This acidity tenderizes the gluten, resulting in a bread with both depth and a slightly sour edge. The longer you let the dough rise, the more pronounced the tang becomes—just like in sourdough!
Can I use store-bought buttermilk instead of acid whey?
Yes! If you don’t have acid whey, use ½ cup buttermilk plus ½ cup water to mimic the tang. The acidity is key for that signature flavor, though homemade whey delivers a more complex profile. For best results, reduce the sugar slightly to balance the extra acidity.
What if my dough feels too sticky?
Add 1 tablespoon flour at a time until the dough pulls away from your fingers. The acid whey makes the dough stickier than usual, but it should still be cohesive—not wet. If it’s too dry after adding flour, add 1 teaspoon water to restore elasticity. The texture should be smooth and slightly tacky, like playdough.
How do I know when the bread is fully baked?
Look for a golden-brown crust and tap the bottom—it should sound hollow. The internal temperature should reach 190°F. If the top browns too fast, tent with foil to prevent burning while keeping the crumb soft. Patience here ensures a perfect bake every time!
Can I make this bread without a Dutch oven?
Use a baking sheet with a metal bowl inverted over the loaf to trap steam. Brush the bowl with water before placing it over the dough to create steam. This mimics a Dutch oven’s effect, giving you a crispy crust without specialized equipment. Just check for doneness early—it may bake faster!