
Side Dishes
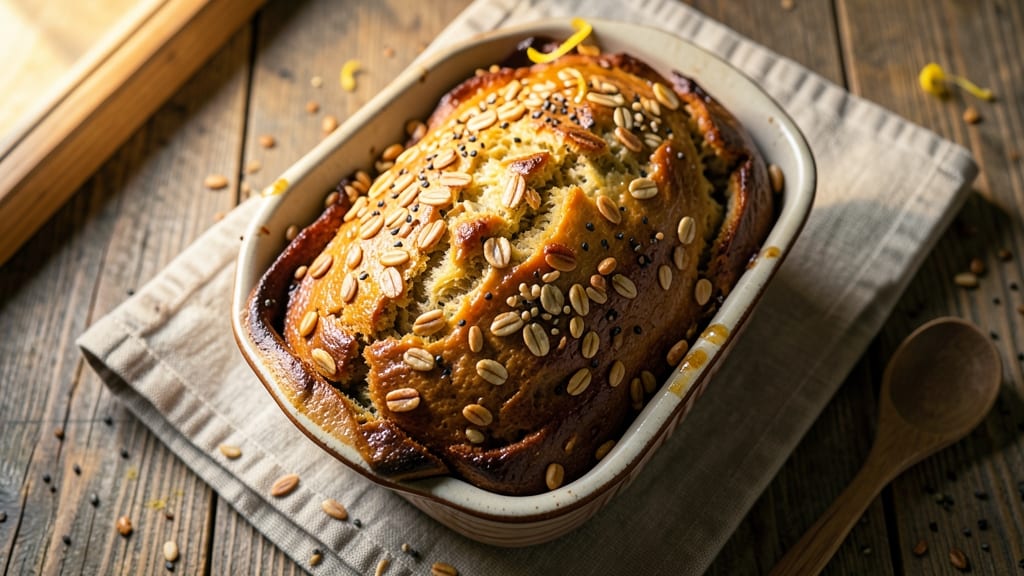
This 9-grain honey oat bread recipe delivers a perfect balance of nutty depth and crisp golden crust—ideal for sandwiches, toast, or serving alongside soups. The combination of whole grains and honey creates a rich, aromatic loaf with a satisfying chew.
Unlike commercial breads, this recipe uses traditional techniques like proper kneading and fermentation for maximum flavor development.
What sets this bread apart is the 9-grain blend, including oats, wheat berries, and seeds, which add texture and nutrition. The honey not only sweetens naturally but also enhances browning for a caramelized crust.
With a foolproof method and 350°F baking, you’ll achieve a loaf that’s tender inside and crisp outside every time.
The recipe includes optional variations like adding flaxseeds or sunflower seeds for extra crunch. Perfect for meal prep, this bread stays fresh for days when stored properly. Whether you’re a beginner or experienced baker, this method ensures restaurant-quality results at home.
Ready to bake? Let’s gather your ingredients and get started on this nutrient-packed, flavorful loaf that’s sure to become a staple in your kitchen.
Ingredients for 9 grain honey oat bread
Gather these wholesome grains and simple pantry staples for a loaf bursting with nutty complexity and golden crust.
| Ingredient | Amount | Notes |
|---|---|---|
| All-Purpose Flour 🌾 | 3 ½ cups | Unbleached for better texture |
| Old-Fashioned Rolled Oats 🥣 | 1 ½ cups | Certified gluten-free if needed |
| Wheat Berries 🌾 | ½ cup | Toasted for enhanced nuttiness |
| Sunflower Seeds 🌻 | ¼ cup | Unsalted for flavor control |
| Flaxseeds 🌱 | ¼ cup | Ground for binding properties |
| Sesame Seeds 🌿 | 2 tbsp | Toasted for nutty aroma |
| Chia Seeds 🌱 | 1 tbsp | Soaked for gel consistency |
| Poppy Seeds 🌱 | 1 tbsp | For subtle earthy flavor |
| Honey 🍯 | ¼ cup | Raw for optimal flavor |
| Active Dry Yeast 🍞 | 2 tsps | Freshly measured for accuracy |
| Granulated Sugar 🍚 | 1 tbsp | For yeast activation |
| Unsalted Butter 🧈 | ½ cup | Cold for proper kneading |
| Warm Water 💧 | 1 ¼ cups | 110°F for yeast activation |
| Salt 🧂 | 1 tsp | Fine sea salt preferred |
| Milk 🥛 | ¼ cup | Warm for tender crumb |
The 9-grain blend is the heart of this recipe, so prioritize quality. Bob’s Red Mill or King Arthur offer pre-mixed grain blends, but toasting whole grains yourself—especially the wheat berries and oats—deepens their natural flavors. For seeds, Bob’s Red Mill unsalted varieties ensure consistent texture. Honey should be raw and unfiltered for optimal caramelization; Manuka or clover honey both work beautifully. The yeast must be fresh—test it in warm water with a pinch of sugar to confirm it foams within 5 minutes before proceeding.
No wheat berries? Substitute with additional rolled oats for similar texture. Swap flaxseeds for ground almonds if preferred, though flax provides better binding. For honey alternatives, maple syrup works at a 1:1 ratio, though it may darken the crust slightly. The butter can be replaced with vegetable shortening for a more neutral flavor, though it lacks richness. For a nut-free option, omit sunflower seeds and increase oats by 0.25 cup. Always measure flour by weight for precision—1 cup flour weighs about 4.5 oz—to avoid dense loaves.
Store the dough in an airtight container at room temperature for up to 24 hours to enhance flavor through slow fermentation. Once baked, wrap the loaf in a clean kitchen towel and store at room temperature for 3 days, or freeze for 3 months. For reheating, wrap the cooled loaf in foil and warm at 300°F for 10 minutes. The crust stays crisp for 2 days when stored properly—perfect for meal prep. Toasting slices revives freshness instantly.
Why You'll Love This Recipe
- No-Fuss Mix-In Magic: I swear by the way those rolled oats and wheat berries blend right into the dough—no chopping, no fuss. Just toss them in raw, let the mixer do the work, and boom: texture so good you’d think you spent hours kneading.
- Honey-Soaked Goodness: That first bite? Warm, slightly chewy bread with a slow-melt honey sweetness that sticks around. The flaxseeds add a nutty crunch while sunflower seeds give it a satisfying bite—like a breakfast bar and sourdough had a baby.
- Weeknight Workhorse: Slice it for toast, pack it for lunches, or just tear off chunks with peanut butter. It’s my go-to for quick sandwiches (hello, school lunches) or when I’m too tired to make anything else. Honestly, it’s the only bread I keep in the house.
- Budget-Friendly Staple: I make a double batch every Sunday because it’s cheaper than buying whole-grain loaves, and it lasts. Freeze half the batch—thawed slices toast up just as well. Plus, those pantry staples (oats, seeds) are way cheaper than specialty flours.
Step-by-step instructions for 9-Grain honey oat bread
Master this artisanal loaf with layers of nutty complexity and a crisp golden crust.
Prepare the Mixed Grains and Hydrate the Seeds
In a small dry skillet, toast the 0.5 cup wheat berries and 2 tbsp sesame seeds over medium heat for 5-6 minutes until fragrant and lightly golden. Transfer to a plate to cool completely. In a separate bowl, combine the 0.25 cup flaxseeds with 0.25 cup milk and let sit for 10 minutes to form a gel-like consistency—this will bind the dough.
Toast the 1 tbsp chia seeds and 1 tbsp poppy seeds in the same skillet for 1-2 minutes until aromatic. Add these to the cooled wheat berries and sesame seeds, then set aside. This preparation step ensures maximum flavor extraction and proper texture development in the final loaf.
Activate the Yeast and Combine Wet Ingredients
In the bowl of a stand mixer fitted with the dough hook, whisk together the 1.25 cups warm water (tested at 110°F), 1 tbsp granulated sugar, and 2 tsps active dry yeast. Let sit for 5-10 minutes until frothy—this confirms the yeast is active and ready to work. If no bubbles form, your yeast may be stale.
Add the 0.25 cup honey, 0.5 cup unsalted butter (cut into small cubes), and 1 tsp salt to the yeast mixture. Mix on low speed for 1-2 minutes until the butter has melted and incorporated completely. The mixture should be smooth with a slight sheen from the honey and butter.
Incorporate Dry Ingredients and Mixed Grains
With the mixer running on low speed, gradually add the 3.5 cups all-purpose flour and the prepared grain mixture (wheat berries, sesame seeds, flaxseed gel, chia seeds, and poppy seeds). Mix for 3-4 minutes until the dough comes together and pulls away from the sides of the bowl. If the dough feels too sticky, add 1-2 tablespoons more flour.
Switch to medium speed and knead for an additional 5 minutes until the dough is smooth and elastic. It should pass the windowpane test—when stretched gently, it should thin enough to see light through without tearing. This kneading develops gluten structure for a light, airy crumb.
First Rise and Shape the Dough
Lightly grease a large mixing bowl with oil, place the dough inside, and cover with a damp towel. Let rise in a warm place for 1-1.5 hours, or until doubled in size. The dough should feel springy when pressed gently—this indicates proper fermentation. If the kitchen is cold, place the bowl near a warm oven with the light on to maintain consistent temperature.
Punch down the risen dough to release air, then turn it out onto a lightly floured surface. Divide the dough in half and shape each piece into a 9-inch log, sealing the seams tightly. Place the shaped loaves seam-side down in two greased 9x5-inch loaf pans, covering lightly with a towel. Let rise again for 30-45 minutes until just puffy above the pan edges.
Bake to Golden Perfection
Preheat the oven to 375°F with a baking stone or inverted baking sheet on the lower rack. Bake the loaves for 35-40 minutes until the tops are deep golden brown and the internal temperature reaches 205°F when measured with an instant-read thermometer. Tap the loaves—if they sound hollow, they're done.
Remove from the oven and transfer to a wire rack to cool for 15 minutes before removing from pans. For extra crust crispness, brush the tops with melted butter while still warm. The bread will continue to develop flavor as it cools, with layers of toasted grain nuttiness balanced by the honey's subtle sweetness.
Pro Tips For Making 9 Grain Honey Oat Bread
- Toast the grains first: I learned this the hard way—skipping it makes the bread taste raw and grainy. Pulse wheat berries, sunflower seeds, and flaxseeds in a dry skillet for 3-4 minutes until fragrant (just until warm, not browned). This unlocks their nutty flavor and prevents a dense crumb.
- Soak the oats overnight: Does it look weird? Yes. Does it work? Every single time. Mix rolled oats with warm water (or milk) and a pinch of salt, then let them plump for 8-12 hours. They’ll absorb liquid like a sponge, making the dough easier to handle and the crumb lighter—no gummy texture here.
- Don’t overmix the dough: After burning three batches of this bread, I finally figured out the dough’s temperamental nature. Mix just until the flour is barely incorporated—lumps are fine. Overworking it develops gluten too much, and you’ll end up with a tough, chewy loaf instead of the tender, hearty texture you’re after.
- Use a digital thermometer: Guessing oven temps with honey and multiple grains is a recipe for disaster. Aim for an internal bread temp of 190°F (88°C)—that’s when it’s fully baked, not just browned. The honey can make the crust look done before the center is, so don’t pull it early.
Essential equipment for 9 grain honey oat bread
Stand Mixer Must-Have
Your KitchenAid Artisan stand mixer with the dough hook attachment is the workhorse for this recipe. The 5-quart bowl handles the sticky dough effortlessly, and the variable speed control lets you adjust from gentle mixing to vigorous kneading.
I’ve found the KSM150PSM model (with power lift) is worth the investment—it makes shaping and handling the dough a breeze. If you’re on a budget, the Hamilton Beach 64630 offers similar power for about half the price. 💡
Baking Pans Essentials
Use 9x5-inch loaf pans with a non-stick coating to prevent sticking—Wilton Professional Non-Stick pans are my go-to. Avoid glass pans, as they can over-bake the crust. For extra crust crispness, I recommend baking on a baking stone or inverted sheet pan on the lower rack to create steam.
If you don’t have a stone, a heavy-duty aluminum baking sheet works well. Grease pans generously with butter or oil before shaping the dough. ❄️
Precision Tools
A digital instant-read thermometer (like the Thermoworks Thermapen ONE) ensures perfect doneness—aim for 205°F internal temperature. For scoring, use a sharp serrated bread knife (I love the Global G2) to make ½-inch-deep cuts before baking.
A damp kitchen towel keeps dough from drying out during rises, and a lightweight aluminum bowl (like OXO Good Grips) helps maintain consistent warmth. 🌡️
Optional Upgrades
For gluten-free baking, invest in a high-quality gluten-free flour blend (like King Arthur Measure for Measure) and a silicon loaf pan (such as Nordic Ware) to prevent sticking.
A proofing basket (like Kitchy) elevates the dough for a rustic look, while a steam injector (for your oven) adds extra crispness to the crust. If you love toasting, a toaster oven (like Breville BOV800XL) keeps slices perfectly crisp without over-browning. 🔥
Nutrition facts
Frequently asked questions
Can I make this 9-grain bread without a stand mixer?
While a stand mixer makes kneading easier, you can mix and knead by hand. Use a large mixing bowl and a wooden spoon to combine ingredients, then turn the dough onto a lightly floured surface. Knead for 8-10 minutes by pressing, folding, and turning the dough until it's smooth and elastic. For the windowpane test, stretch a small piece of dough—it should thin to near-transparency without tearing. Patience is key with hand-kneading!
Why did my bread turn out dense instead of light and airy?
Dense bread often results from over-kneading, under-proofing, or using cold ingredients. First, ensure your yeast is active (it should foam within 5-10 minutes in warm water). Second, let the dough rise until it's doubled in size—this can take 1-1.5 hours in a warm kitchen. Finally, avoid adding too much flour during kneading, as this can weigh down the crumb. If your kitchen is cold, place the dough near a warm oven with the light on to maintain consistent temperature.
How can I add extra protein to this recipe?
Boost protein by incorporating 1/4 cup vital wheat gluten (for gluten-free adaptations) or 1/2 cup ground flaxseed instead of some of the all-purpose flour. For a nutty twist, add 1/4 cup chopped walnuts or almonds to the dough. These additions enhance texture and nutritional value while keeping the bread's signature flavor. Just be mindful that seeds and nuts may slightly alter the crumb's tenderness.
Can I make this bread in a Dutch oven for a rustic crust?
Yes! Shape the dough into a free-form loaf and place it in a preheated Dutch oven at 425°F. Cover and bake for 25 minutes, then remove the lid and bake for another 15-20 minutes until the crust is deep golden brown. This method creates a crispy exterior with a soft interior, perfect for serving with soups or dips. Just be sure to score the top before baking to allow steam to escape.
How do I store leftovers to keep them fresh?
Wrap the cooled loaf tightly in plastic wrap or place it in an airtight container to preserve freshness. Store at room temperature for 3-4 days, or freeze for up to 3 months. To reheat, wrap a slice in foil and warm at 350°F for 5-7 minutes or toast in a toaster oven for 2-3 minutes. For extra crispiness, brush slices with melted butter before toasting.