
Main Courses
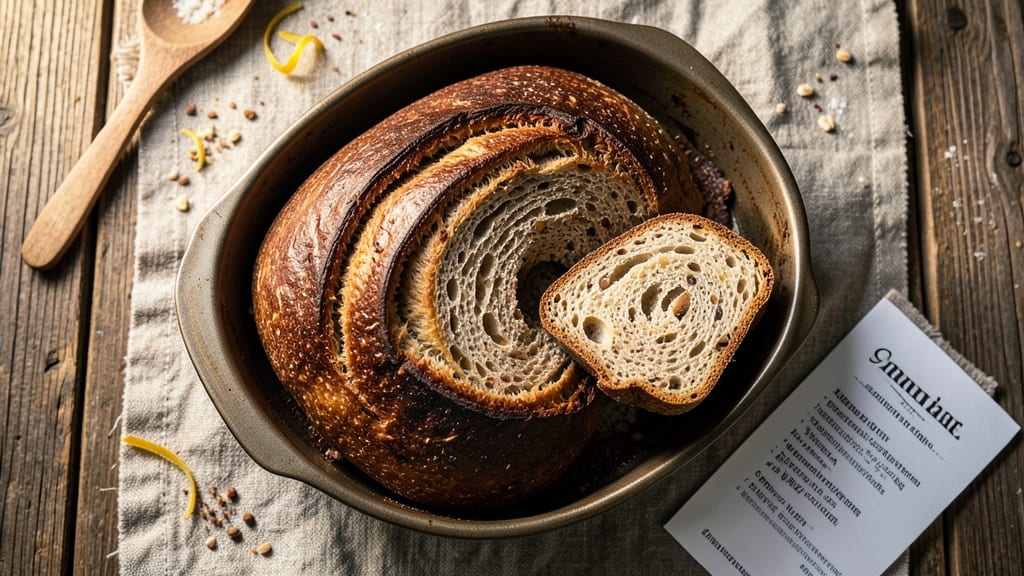
This 9-grain bread machine recipe delivers a loaf packed with nutty flavor, crunchy crust, and seeds that add texture with every bite. The beauty of using a bread machine lies in its ability to handle the kneading and proofing for you—no manual effort required.
I’ve perfected this recipe to ensure a dense yet airy crumb, with a golden-brown crust that’s just crisp enough to hold up to toast or sandwiches.
The secret to success lies in the hydration balance and seed selection. A mix of whole grains like wheat, rye, and oats creates depth, while seeds such as flax, sunflower, and pumpkin add crunch and nutrition.
The bread machine does the heavy lifting, but the right settings—a standard dough cycle with a 2-pound loaf pan—ensure a perfectly risen loaf without overproofing.
By the time it’s done, you’ll have a hearty, nutty-sweet loaf that’s ideal for breakfast toast, sandwiches, or even as a side to soups and stews. The seeds stay crunchy, while the crust develops that satisfying snap.
This recipe is designed to be reproducible every time, with minimal adjustments needed even for beginners.
For extra flavor, consider adding a touch of honey or cinnamon to the dough, or swap out seeds for your favorites. Store the bread in an airtight container for up to 5 days or freeze for longer shelf life. Let’s get started on this wholesome, seed-studded loaf!
Ingredients for 9 grain bread recipe for bread machine
Nine whole grains and seeds create a hearty, nutty-sweet loaf with perfect crust and crunch.
| Ingredient | Amount | Notes |
|---|---|---|
| All-Purpose Flour 🌾 | 2 cups | Unbleached preferred for lighter texture |
| Whole Wheat Flour 🌾 | 1 cup | For added fiber and nuttiness |
| Rye Flour 🌾 | ½ cup | Dark rye for deeper flavor |
| Oat Flour 🌾 | ½ cup | Ground oats for texture |
| Active Dry Yeast 🍞 | 2 ¼ tsp | Ensure yeast is fresh |
| Granulated Sugar 🍚 | ½ cup | Enhances browning and flavor |
| Salt 🧂 | 1 ½ tsp | Diamond Crystal preferred |
| Warm Water 💧 | 1 ¼ cups | 110°F for optimal yeast activation |
| Flax Seeds 🌰 | ¼ cup | Whole seeds for crunch |
| Sunflower Seeds 🌻 | ¼ cup | Raw and unsalted |
| Pumpkin Seeds 🎃 | ¼ cup | Pepitas for extra crunch |
| Sesame Seeds 🌾 | 2 tbsp | Toasted for nutty aroma |
| Olive Oil 🫒 | 2 tbsp | Extra-virgin for richness |
The flours are the foundation—King Arthur or Bob’s Red Mill work best for consistent results. Rye adds depth, while oat flour keeps the crumb tender. For seeds, Bob’s Red Mill or bulk bins at Whole Foods offer the freshest options. Toast the sesame seeds in a dry pan for 2 minutes before adding—they’ll release their nutty aroma and stay crisp. If you’re short on time, pre-ground oat flour saves effort, but grinding your own oats gives a fresher flavor. The yeast must be fresh; if it’s past its expiration, toss it and start over.
No rye flour? Substitute half the amount with whole wheat—it won’t be identical, but the texture stays close. Sunflower seeds too pricey? Pumpkin seeds alone work just fine. Olive oil can be swapped for avocado oil if you prefer a milder taste. For extra sweetness, add 1 tbsp honey to the dough (though the recipe balances well without). The seeds can be mixed ahead of time and stored in the freezer for up to 3 months—just add them fresh when mixing the dough. If you’re making this for a crowd, double the recipe but use a 3-pound loaf pan for even baking.
This loaf stays fresh in an airtight container for 5 days—wrap it in a clean kitchen towel to maintain moisture. For longer storage, freeze slices wrapped in parchment paper for up to 3 months. The crust stays crisp for the first day, but after that, rewarm slices in a 350°F oven for 5 minutes to restore crunch. Leftovers make great toast or French toast—just brush with a little olive oil and cinnamon before toasting for extra flavor. The seeds stay crunchy for days, making this bread perfect for snacking straight from the bag.
Why You'll Love This Recipe
- No-Knead Magic: The bread machine does all the work—just toss in the five flours (all-purpose, whole wheat, rye, oat) plus yeast, add water, and hit start. I’ve made this while scrolling through emails; the machine handles the rising, shaping, and baking.
- Earthy, Nutty Kick: That blend of rye and oat flour? It’s like a warm hug in every bite—slightly sweet, with a deep, toasty crunch. Honestly, the first slice makes me pause mid-morning coffee just to savor it.
- Meal Prep MVP: I slice it fresh and freeze half the loaf—perfect for toast, sandwiches, or croutons later. The whole wheat and rye keep it hearty enough to hold up for days without getting soggy.
- Pantry Stretch: Using mostly whole grains and no specialty ingredients keeps costs low, and the recipe stretches a single batch to feed four for breakfast and lunch. Between us, this is how I feed my family without breaking the bank.
Step-by-step instructions for 9-Grain bread machine recipe
Here's a straightforward method for creating a hearty, seed-packed loaf with a perfect crust.
Mix the Flours and Dry Ingredients
In your bread machine pan, combine the 2 cups all-purpose flour, 1 cup whole wheat flour, 0.5 cup rye flour, and 0.5 cup oat flour. I like to whisk these together in a separate bowl first to ensure even distribution of the different flours—this prevents pockets of whole grain from forming in your final loaf.
Next, add the 2.25 teaspoons active dry yeast, 0.5 cup granulated sugar, and 1.5 teaspoons salt. The sugar isn't just for sweetness—it helps create that beautiful golden crust. Sprinkle the 0.25 cup flax seeds, 0.25 cup sunflower seeds, 0.25 cup pumpkin seeds, and 2 tablespoons sesame seeds last. Give everything a quick stir with a wooden spoon to break up any clumps.
Add Wet Ingredients and Combine
Pour in the 2 tablespoons olive oil and 1.25 cups warm water (around 110°F). The water should be warm enough to dissolve the sugar but not hot enough to kill the yeast. Use a silicone spatula to gently fold everything together until you have a shaggy, sticky dough that comes together when pressed.
Here's the thing—this dough will be thicker than typical bread dough because of all the seeds and whole grains. Don't worry if it looks dry at first; the machine will work it into a smooth, elastic texture during kneading. If it seems too stiff, add 1 teaspoon more water at a time until it forms a cohesive ball.
Set the Bread Machine and Begin
Transfer the dough to your bread machine pan and make sure it's positioned correctly—it should fill about ⅔ of the pan without overflowing. Select the "Basic" or "Whole Wheat" setting on your bread machine, depending on your model. The machine will automatically knead the dough for about 5-10 minutes before switching to the rise cycle.
You'll know the dough is ready when it doubles in size and feels light and springy. The machine will handle all the heavy lifting, but I recommend checking the dough after 30 minutes to ensure it's rising properly. If it's not, you may need to adjust the yeast amount slightly next time—sometimes whole grains absorb moisture differently.
Bake to Golden Perfection
Once the machine indicates the dough is ready for baking, let it run its course. The bread will bake for about 30-45 minutes, depending on your machine. You'll know it's done when the loaf sounds hollow when tapped on the bottom and the internal temperature reaches 190-200°F.
The crust should be a deep golden brown with visible seeds peeking through. If it's browning too quickly, loosely tent the pan with aluminum foil after 20 minutes to prevent over-browning. Let the bread cool in the pan for 10 minutes before transferring it to a wire rack—this prevents it from becoming gummy inside.
Slice and Serve
Once fully cooled, slice the bread with a serrated knife for clean cuts. The interior should be moist but not wet, with a beautiful mix of flours and seeds throughout. Each slice will have a satisfying crunch from the seeds and a tender, slightly dense crumb from the whole grains.
This bread is best enjoyed fresh but will keep well wrapped at room temperature for 2-3 days or frozen for up to 3 months. For extra flavor, brush the warm loaf with melted butter or serve with your favorite jam. The nutty, crunchy texture makes it perfect for sandwiches or toast.
Pro Tips For Making 9 Grain Bread Recipe For Bread Machine
- Use Warm Water Only: That yeast packet is begging for warmth—cold water kills it before it wakes up. Mix your liquid ingredients (including honey or sugar if your recipe calls for it) with water heated to 110°F (43°C) max, then let it sit for 5 minutes before adding to the bread machine. I learned this the hard way when my dough took three extra hours to rise because the yeast was half-asleep.
- Sift the Oat Flour: Oat flour is sneaky—it clumps like glue if you just scoop it in. Lightly sift it through a fine-mesh sieve before measuring, then whisk the bowl to break up any remaining lumps. Skipping this step means your bread machine will fight to mix the dough evenly, and you’ll end up with dense pockets where the oats didn’t incorporate.
- Don’t Overload the Pan: Nine grains mean heavier dough, but cramming it into the bread machine pan like it’s a Thanksgiving turkey will backfire. Press the dough down firmly but leave a ½-inch gap at the top—this prevents overflow during kneading and lets the bread expand properly. I once had dough spill over the pan edge, and the cleanup was a nightmare.
- Add Honey Last: Honey or molasses? Toss it in after the yeast and water mix, right when you’re dumping everything into the machine. These sweeteners feed the yeast, but adding them too early can trigger fermentation before the machine starts kneading—leading to a sticky, uneven mess. Trust me, your dough will thank you with a lighter crumb.
Common mistakes when making this recipe
Overmixing the Dough
The bread machine handles kneading, but you can still overwork the dough if you interfere too much. Avoid manually mixing after the machine starts—its paddles are designed to develop gluten gradually.
If you notice the dough becomes tough or elastic during kneading, stop the machine, let it rest for 5 minutes, then resume. Overmixing leads to a dense, chewy loaf instead of the tender crumb we want with all those seeds. 🌾
Skipping Seed Toasting
Sesame seeds need a quick toast in a dry pan for 2 minutes before adding to the dough. Untosted seeds stay bland and can release moisture, making the crust soggy. I’ve ruined a loaf or two by forgetting this step—always toast them first!
Toasting also enhances their nutty aroma, which carries through the entire loaf. For extra flavor, lightly toast the flax and sunflower seeds too.
Wrong Water Temperature
Water that’s too hot (above 120°F) kills the yeast instantly, while water below 100°F fails to activate it properly. Test your water with a thermometer—I use an instant-read one—and aim for 110°F.
If your tap water runs hot, let it cool slightly before adding. Cold water slows fermentation, resulting in a flat, dense loaf. The yeast needs warmth to work its magic with all those whole grains.
Overfilling the Pan
This dough is thick, but packing it too tightly into the pan prevents proper rising. Fill only ⅔ of the pan’s capacity—any more risks a messy overflow or uneven baking. Press the dough down gently with a wet spatula to shape it neatly.
Overfilling also causes the seeds to concentrate in one area, creating an uneven texture. Leave room for the dough to expand during proofing.
Ignoring the Proofing Check
After 30 minutes, peek at the dough—it should be smooth, elastic, and just starting to rise. If it’s still shaggy or flat, your yeast might need a boost (try 0.25 tsp more). Whole grains absorb moisture differently, so proofing can take longer.
Let the machine handle it, but don’t walk away—this is the critical stage where flavor and texture develop. A rushed proof leads to a compact, flavorless loaf.
Premature Slicing
Cutting into the bread too soon traps steam inside, making the crumb gummy. Wait until it’s completely cooled (at least 1 hour) before slicing. The seeds stay crunchy longer when the bread has fully set.
If you’re impatient, slice just one piece to test—then cover the rest tightly. The internal temperature should drop below 100°F before slicing for the best texture. Patience here makes all the difference! ⏳
Nutrition facts
Frequently asked questions
Can I substitute any of the flours in this 9-grain recipe?
Yes, but with some adjustments. For rye flour, swap it 1:1 with whole wheat flour—it adds depth but makes the dough denser. If you don’t have oat flour, grind 1 cup rolled oats into a fine powder first. Avoid replacing more than ½ cup of all-purpose flour with other types, or the texture may become too heavy. The key is balancing hydration—whole grains absorb moisture differently!
Why does my bread machine dough look too dry or sticky?
This recipe’s dough is naturally thicker due to seeds and whole grains. If it’s too dry, add 1 teaspoon water at a time until it forms a cohesive ball. For sticky dough, reduce water by 1 tablespoon or add 1 extra tablespoon flour. The bread machine will adjust during kneading, but starting with the right consistency prevents issues. Whole grains like rye and oats absorb moisture differently—adjust gradually!
How do I know when the bread is fully baked?
The bread is done when it sounds hollow when tapped on the bottom and the internal temperature reaches 190-200°F. The crust should be deep golden brown with seeds visible. If it browns too quickly, tent with foil after 20 minutes. Let it cool in the pan for 10 minutes before removing—this prevents a gummy interior. A toothpick inserted should come out clean or with a few moist crumbs.
Can I make this recipe without a bread machine?
Yes, but you’ll need to handle kneading and proofing manually. Mix the dough as directed, then knead by hand for 8-10 minutes until smooth. Let it rise in a warm place for 1-2 hours (or until doubled), then shape and bake at 375°F for 35-40 minutes in a loaf pan. The texture will be slightly denser without the machine’s precision, but still delicious! The seeds add crunch either way.
How can I add extra flavor to this bread?
Try these easy upgrades: Swap 1 tablespoon of sugar for honey or maple syrup, or add 1 teaspoon cinnamon to the dough. For savory versions, reduce sugar to ¼ cup and add 1 teaspoon dried rosemary or garlic powder. Brush the warm loaf with melted butter and sprinkle with flaky salt. The seeds already add nuttiness, but these tweaks take it to the next level!